


This is a comprehensive guide that will help you implement video stream substitution in Linken Sphere without the risk of detection by anti-fraud systems. Disabling the Physical Camera in Windows
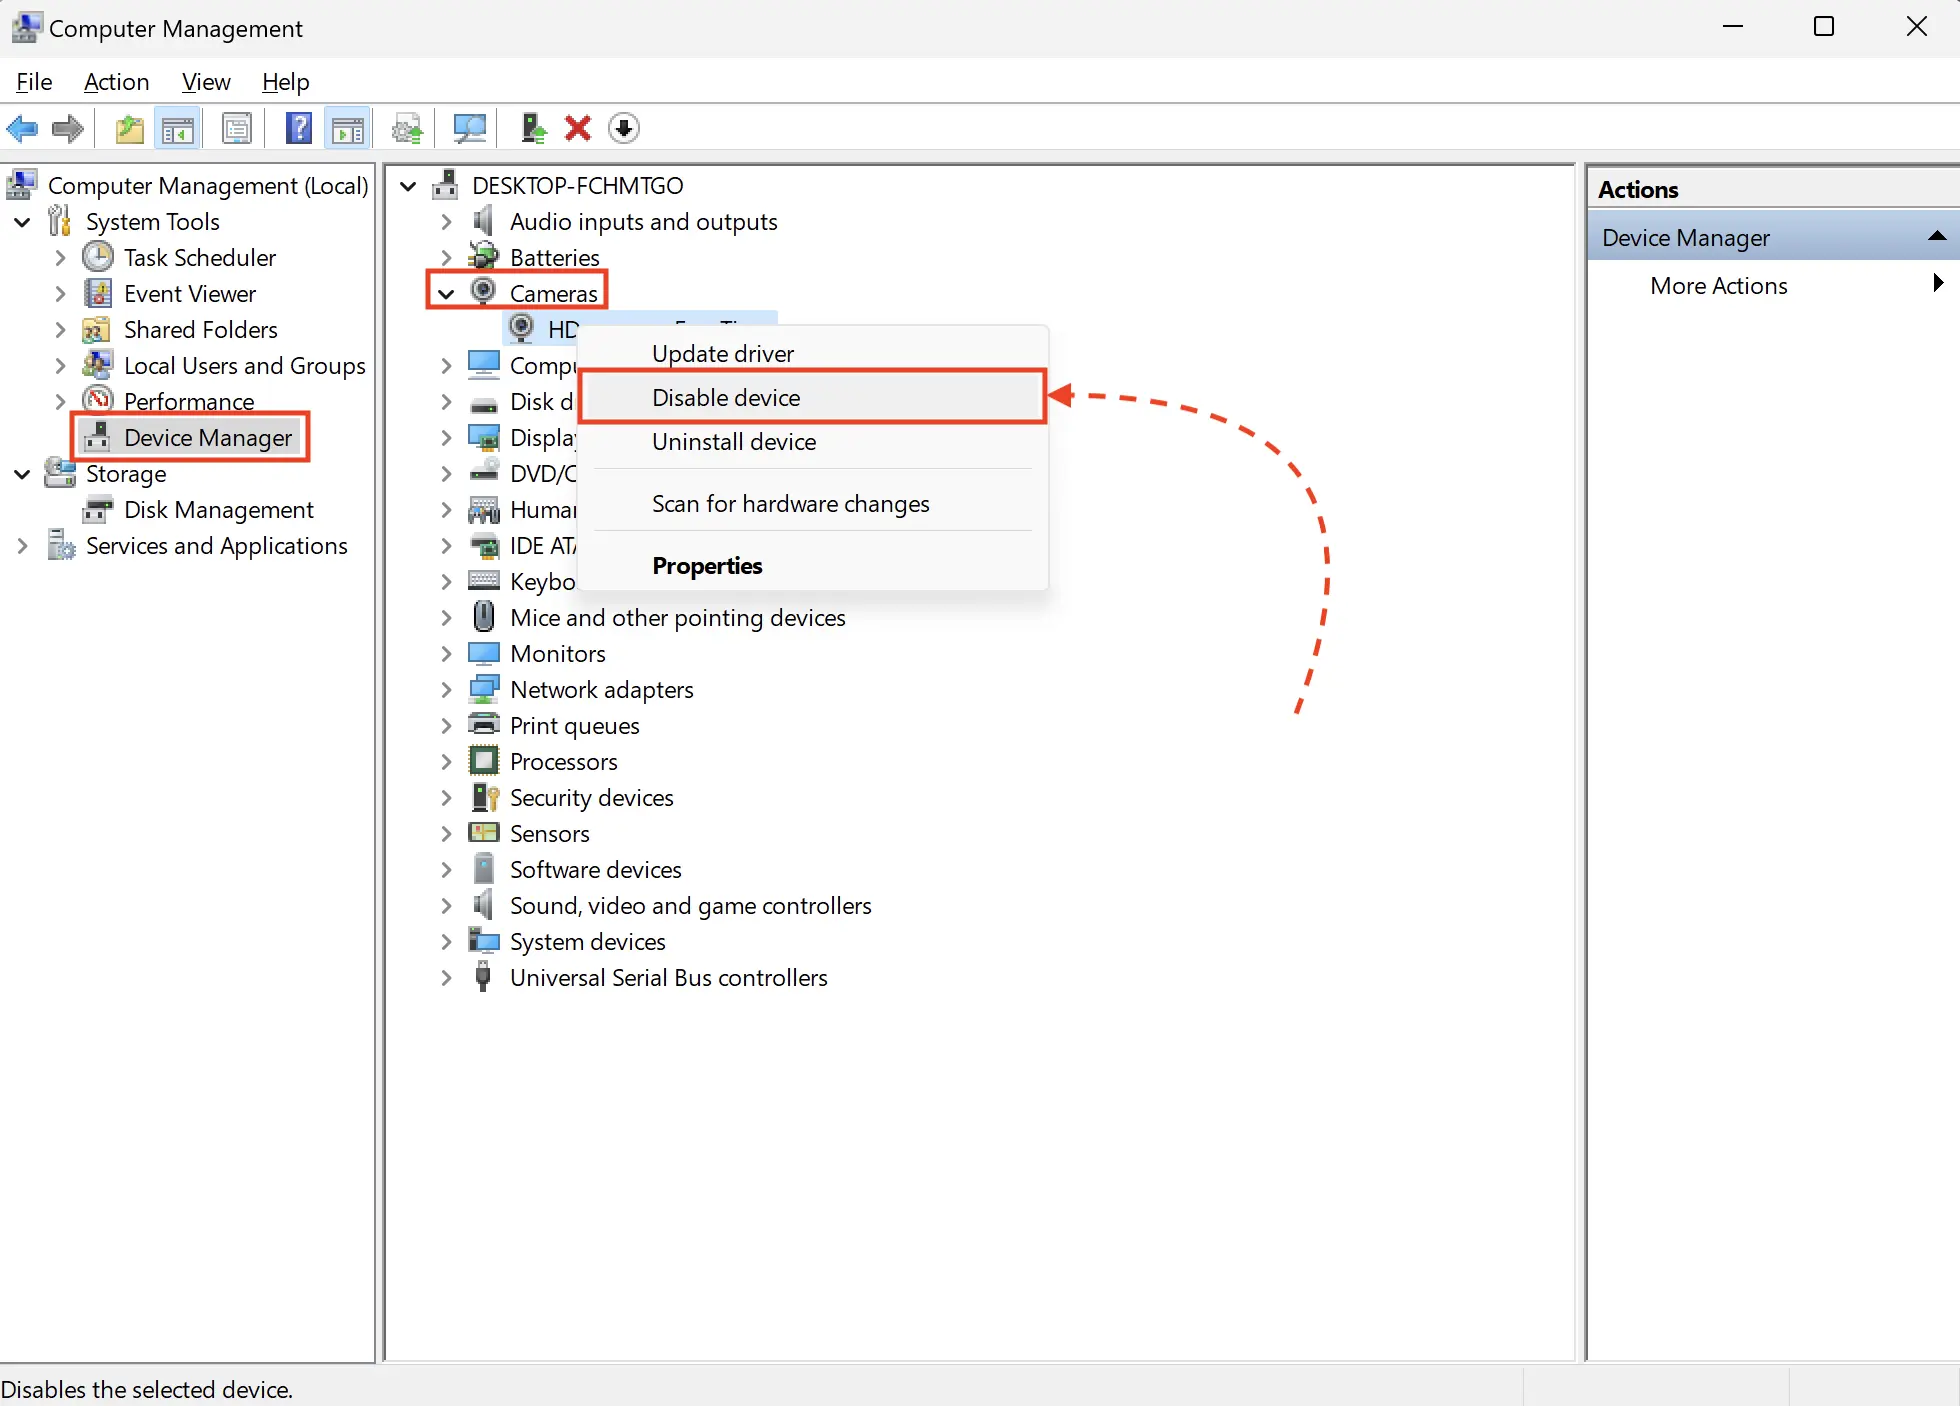
Chrome does not have a clear priority for cameras, so the only way to force LS to use the OBS virtual camera is to disable the physical camera via the device manager. To do this, follow these steps:
- Press WIN+R → enter
compmgmt.msc - In the window that opens, go to Device Manager
- Expand the list of available cameras
- Right-click on your camera > Disable device
Configuring Camera Access in Windows For cameras, including virtual ones, to work correctly in LS, you need to grant the necessary permissions in the settings. Below is a guide on how to do this. Windows 11
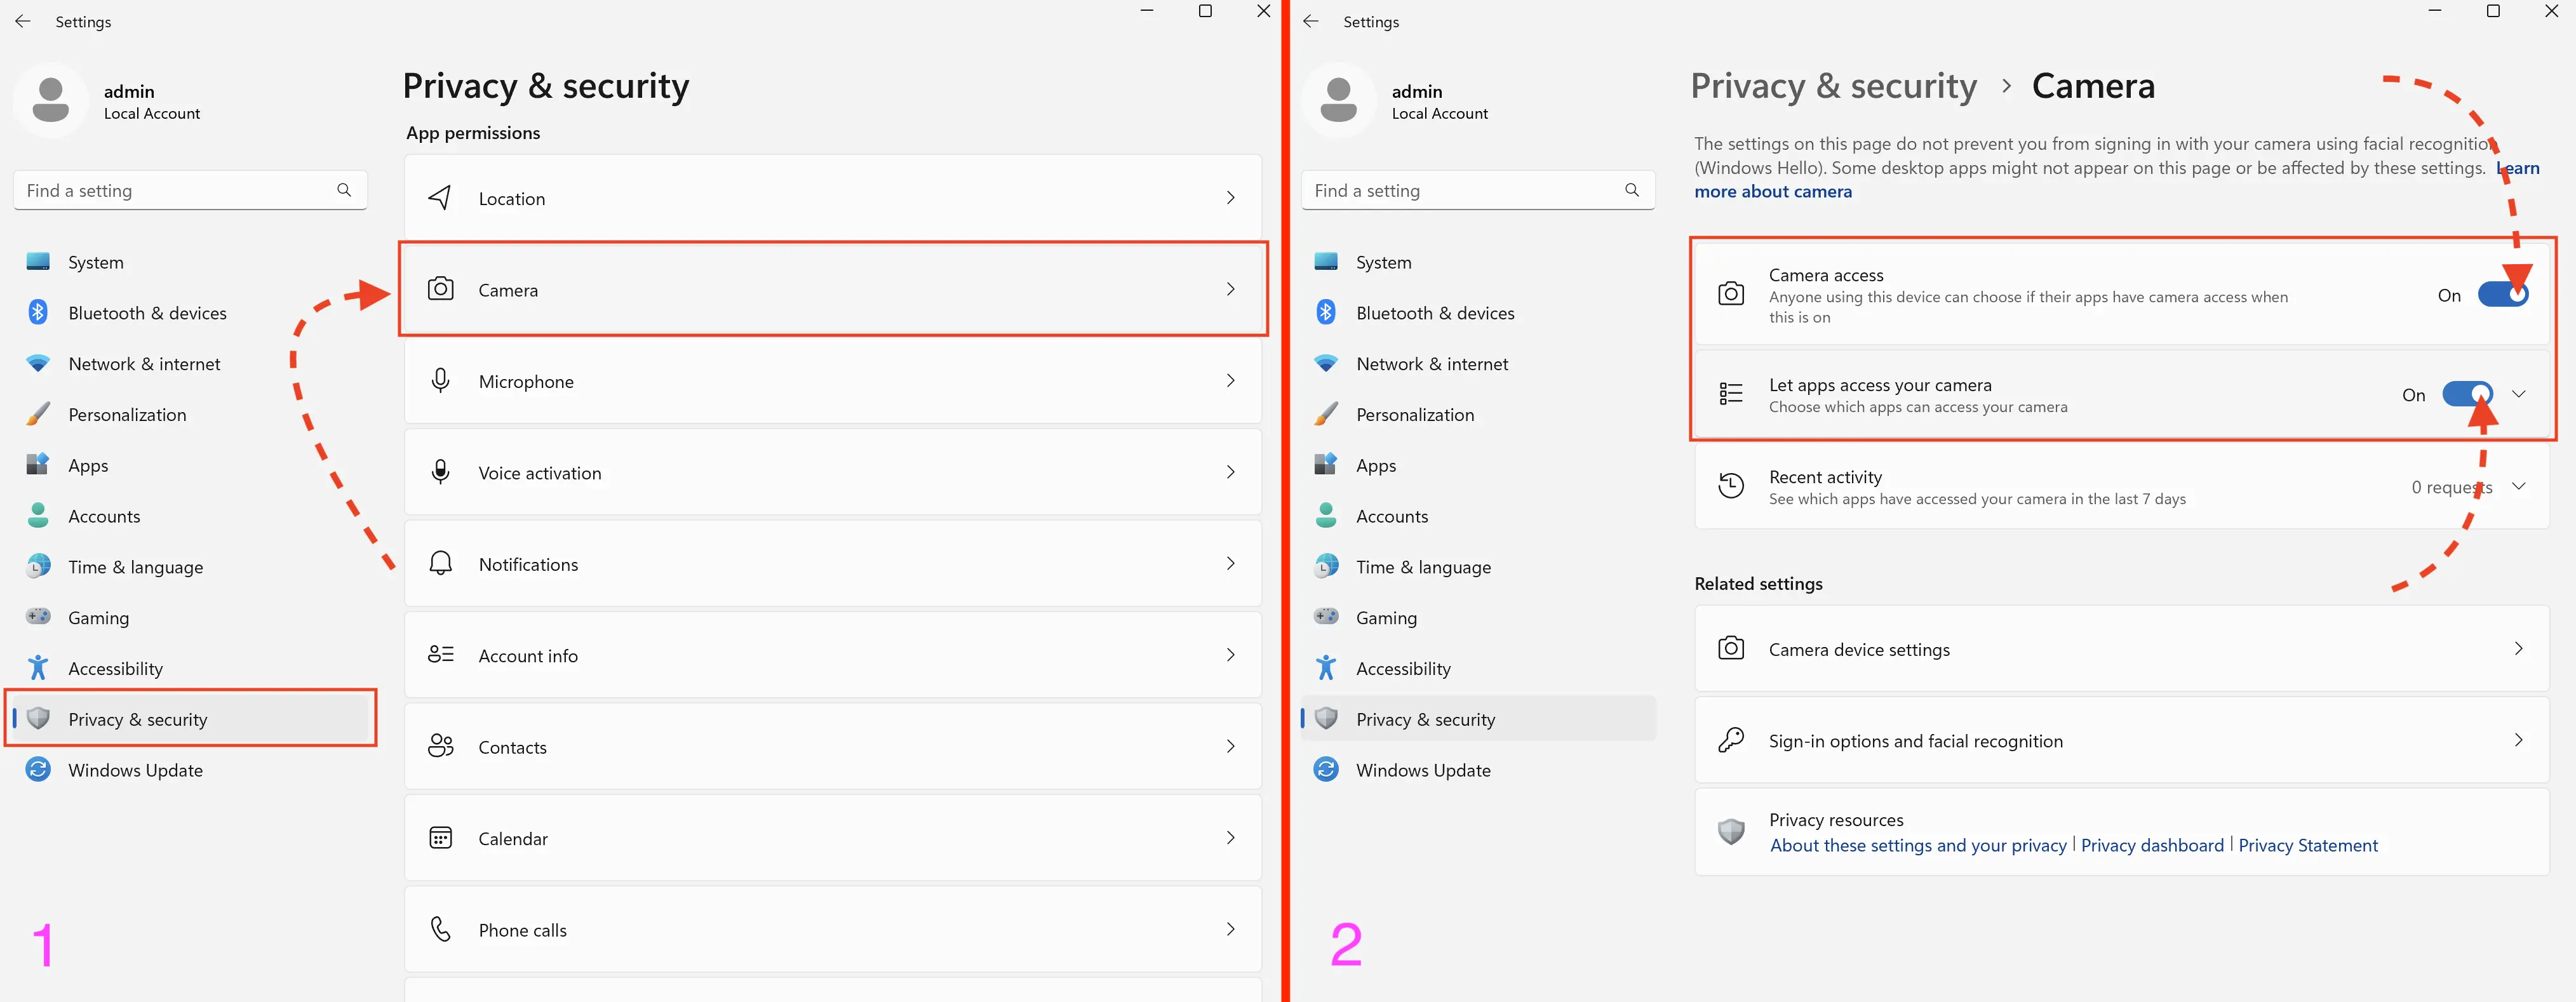
For Windows 11:
- Go to Privacy & security > Camera
- Enable Camera access and Let apps access your camera
Windows 10

For Windows 10:
- Go to Privacy > Camera
- Enable Allow access to the camera on this device and Allow apps to access your camera
Installing OBS Studio and the obs-virtual-cam Plugin
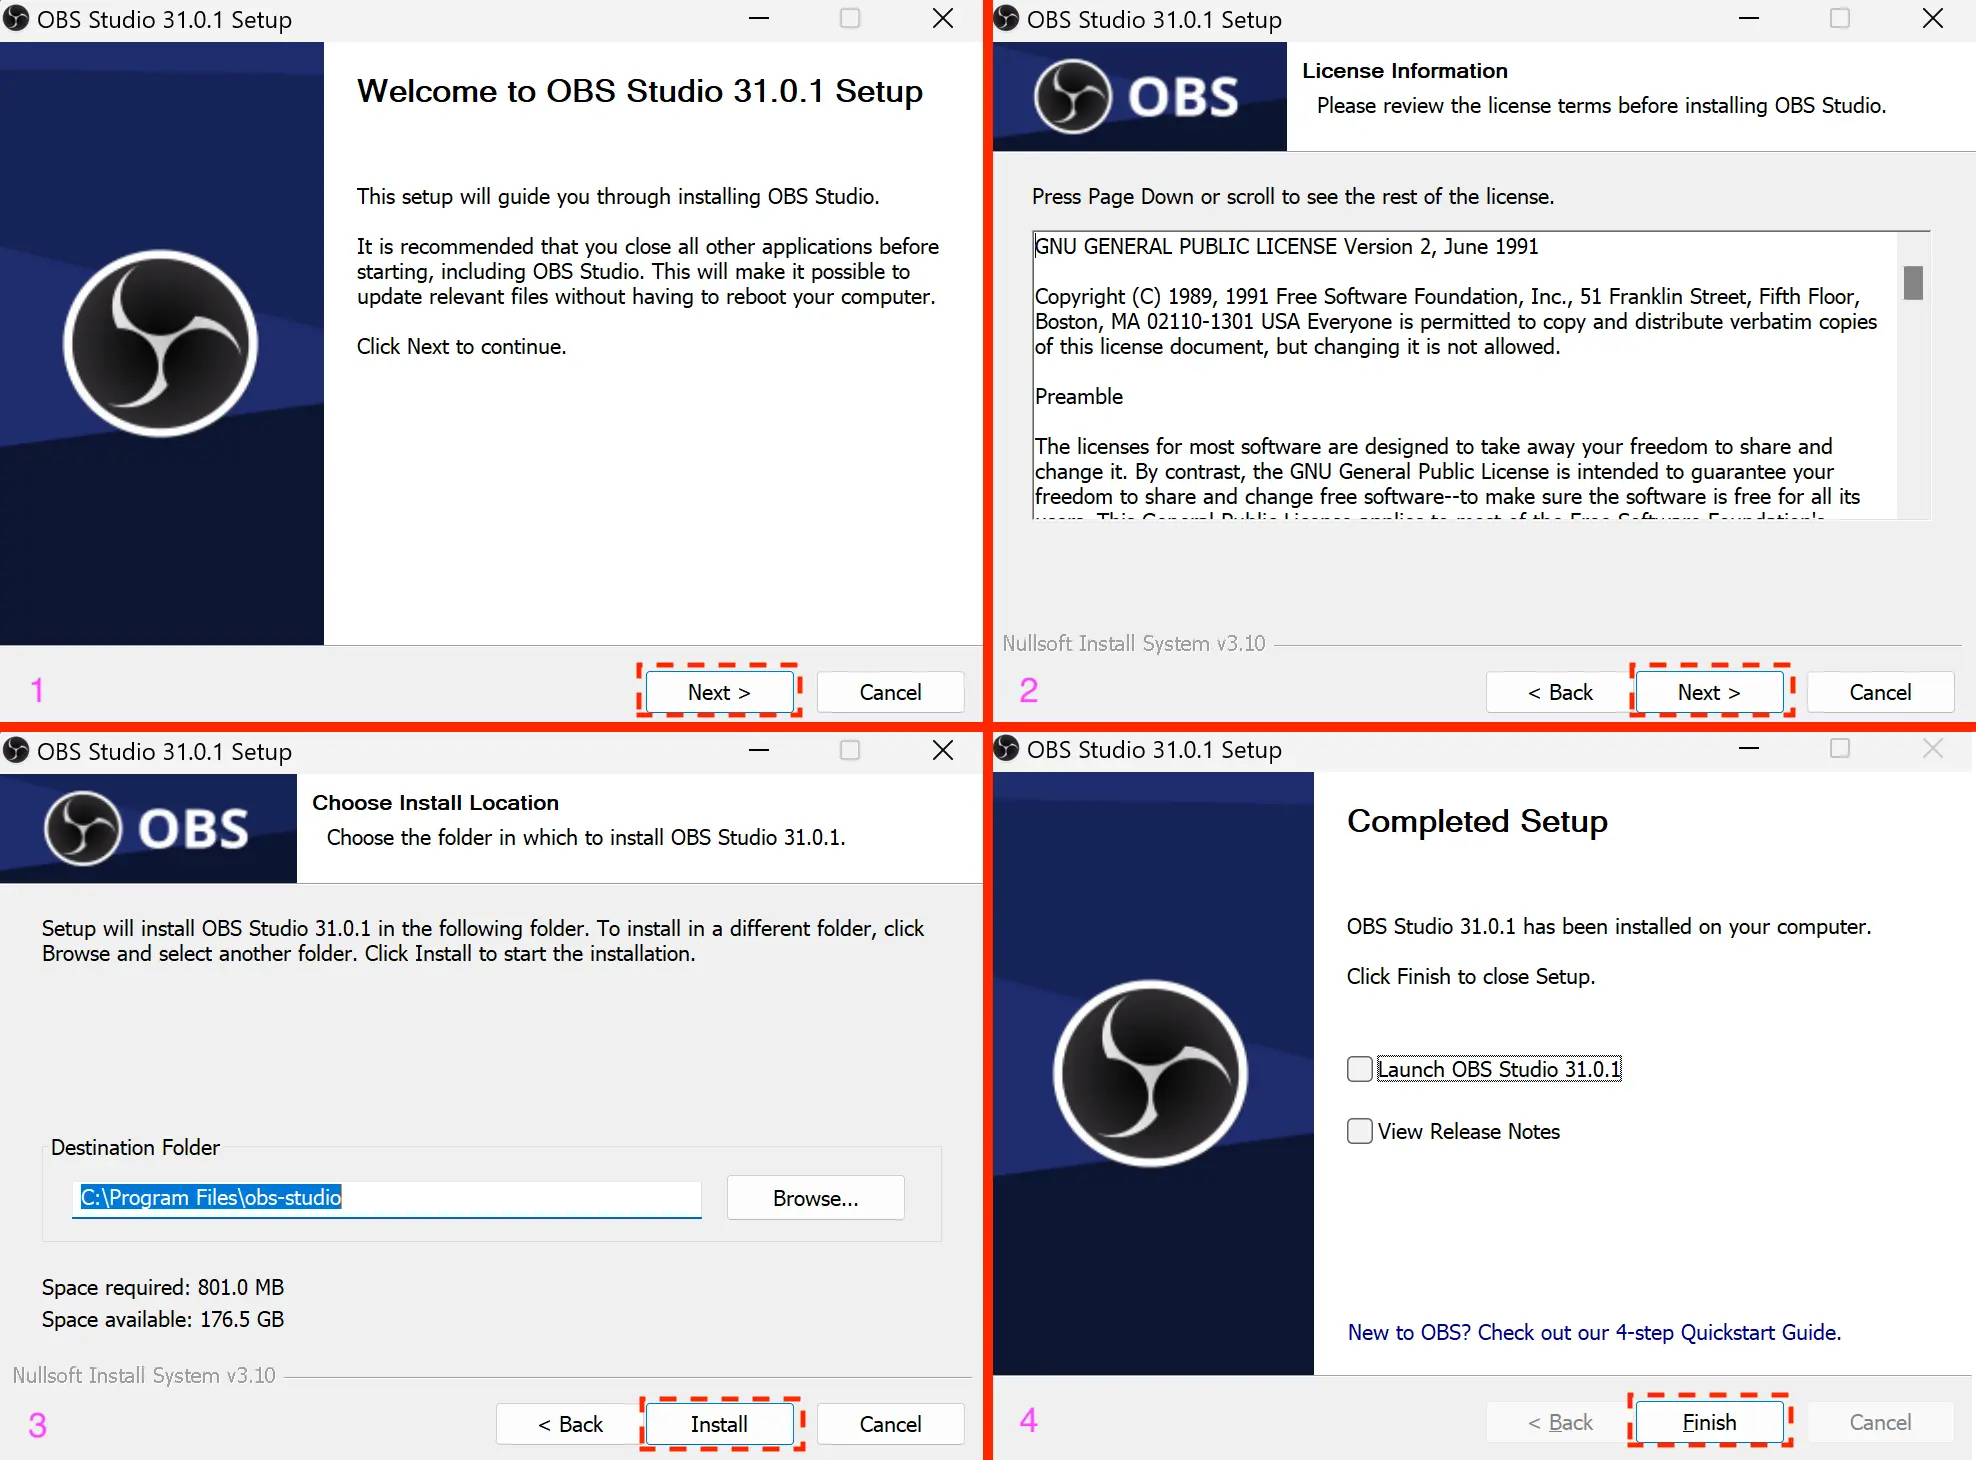
1. Download the OBS Studio installer from this link – https://obsproject.com/download 2. Install the program as shown in the screenshots above (use the default settings).

3. Download the obs-virtual-cam plugin from this link – https://github.com/miaulightouch/obs-virtual-cam/releases/latest This plugin increases the number of virtual cameras to 4 and allows them to be used simultaneously, which is particularly important when working with mobile configurations. When downloading, select the file with “installer” in the name.
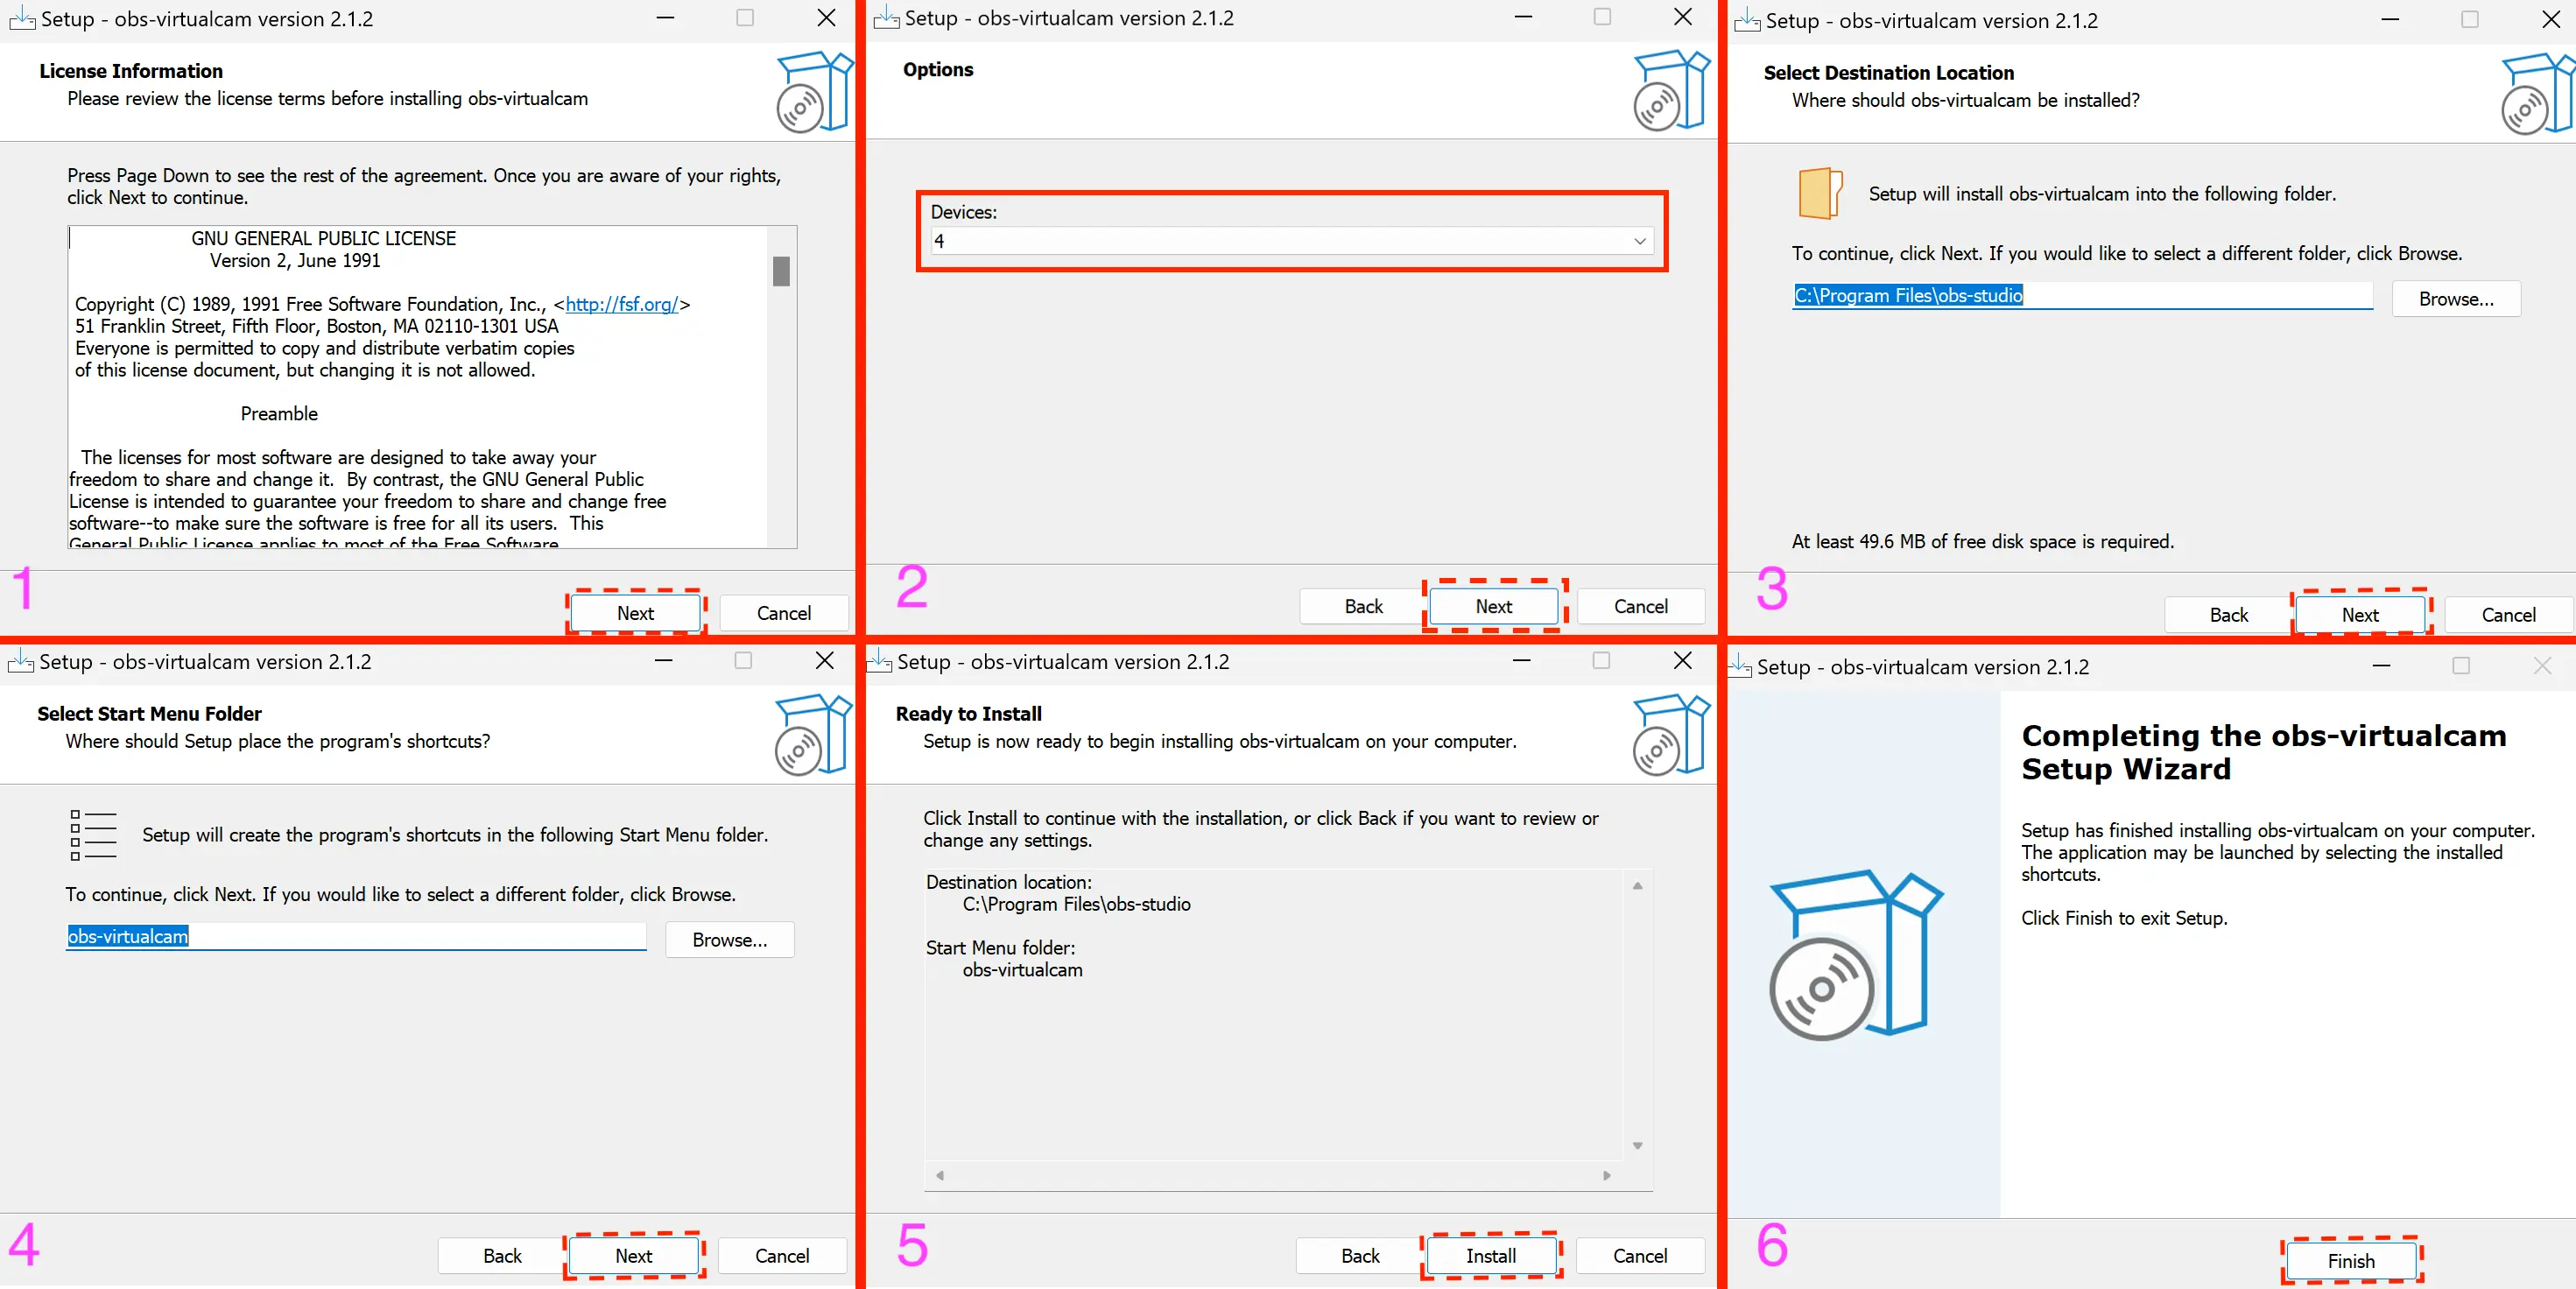
4. Install the plugin as shown in the screenshots above. On the second step, select 4 devices; otherwise, keep the default settings. Configuring OBS Studio and Working with LS
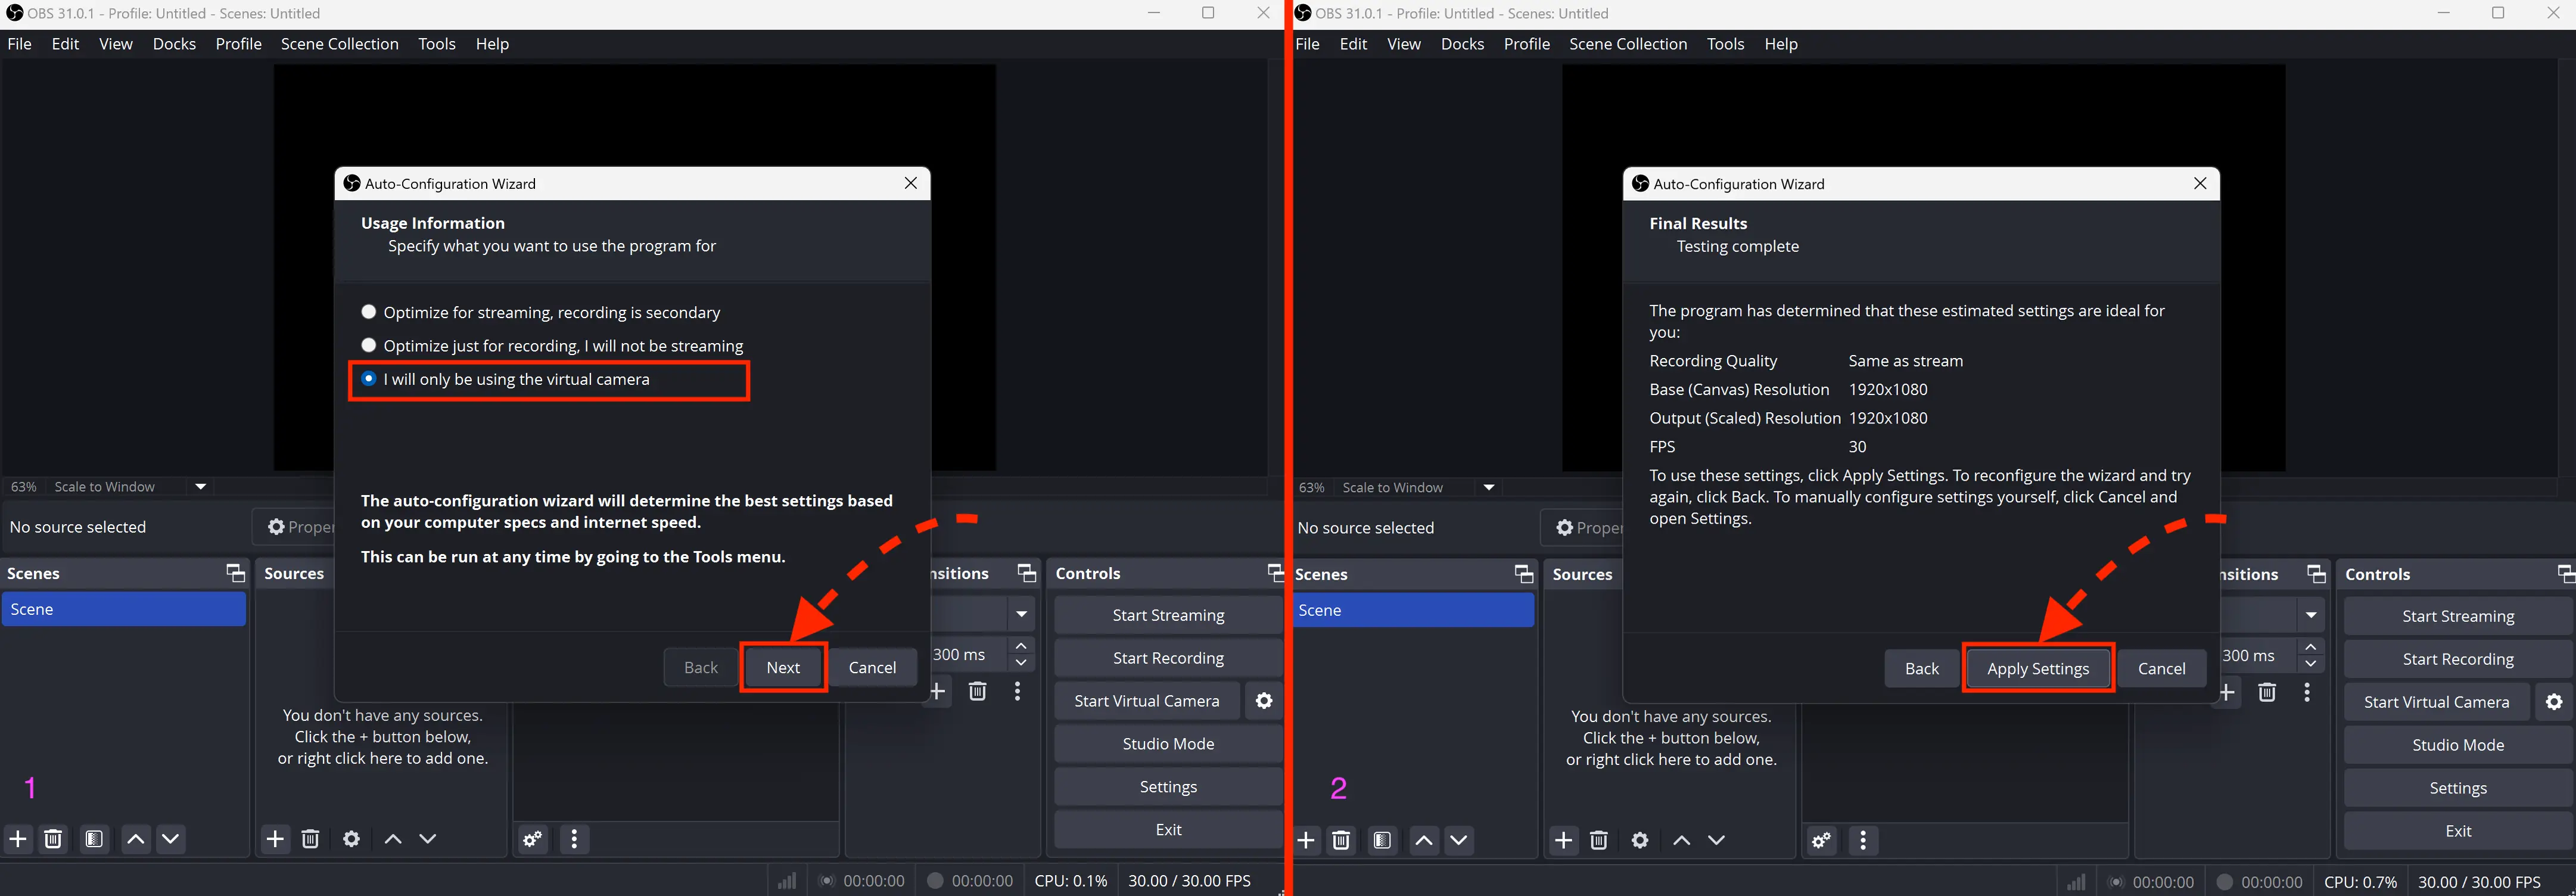
When you launch OBS for the first time, it will ask about your intended use for automatic configuration. Select the option shown in the screenshot above. Setting Up Scenes and Stream Sources Scenes in this case will be used as separate virtual cameras. You can find them in the bottom left corner. Initially, one scene is created. If you are only working with desktop configurations, this will be sufficient. However, for mobile configurations, additional scenes will need to be created. The number of required scenes depends on the number of cameras in the chosen configuration—ranging from 2 to 4 (some devices have more than two cameras, such as wide-angle or telephoto lenses).
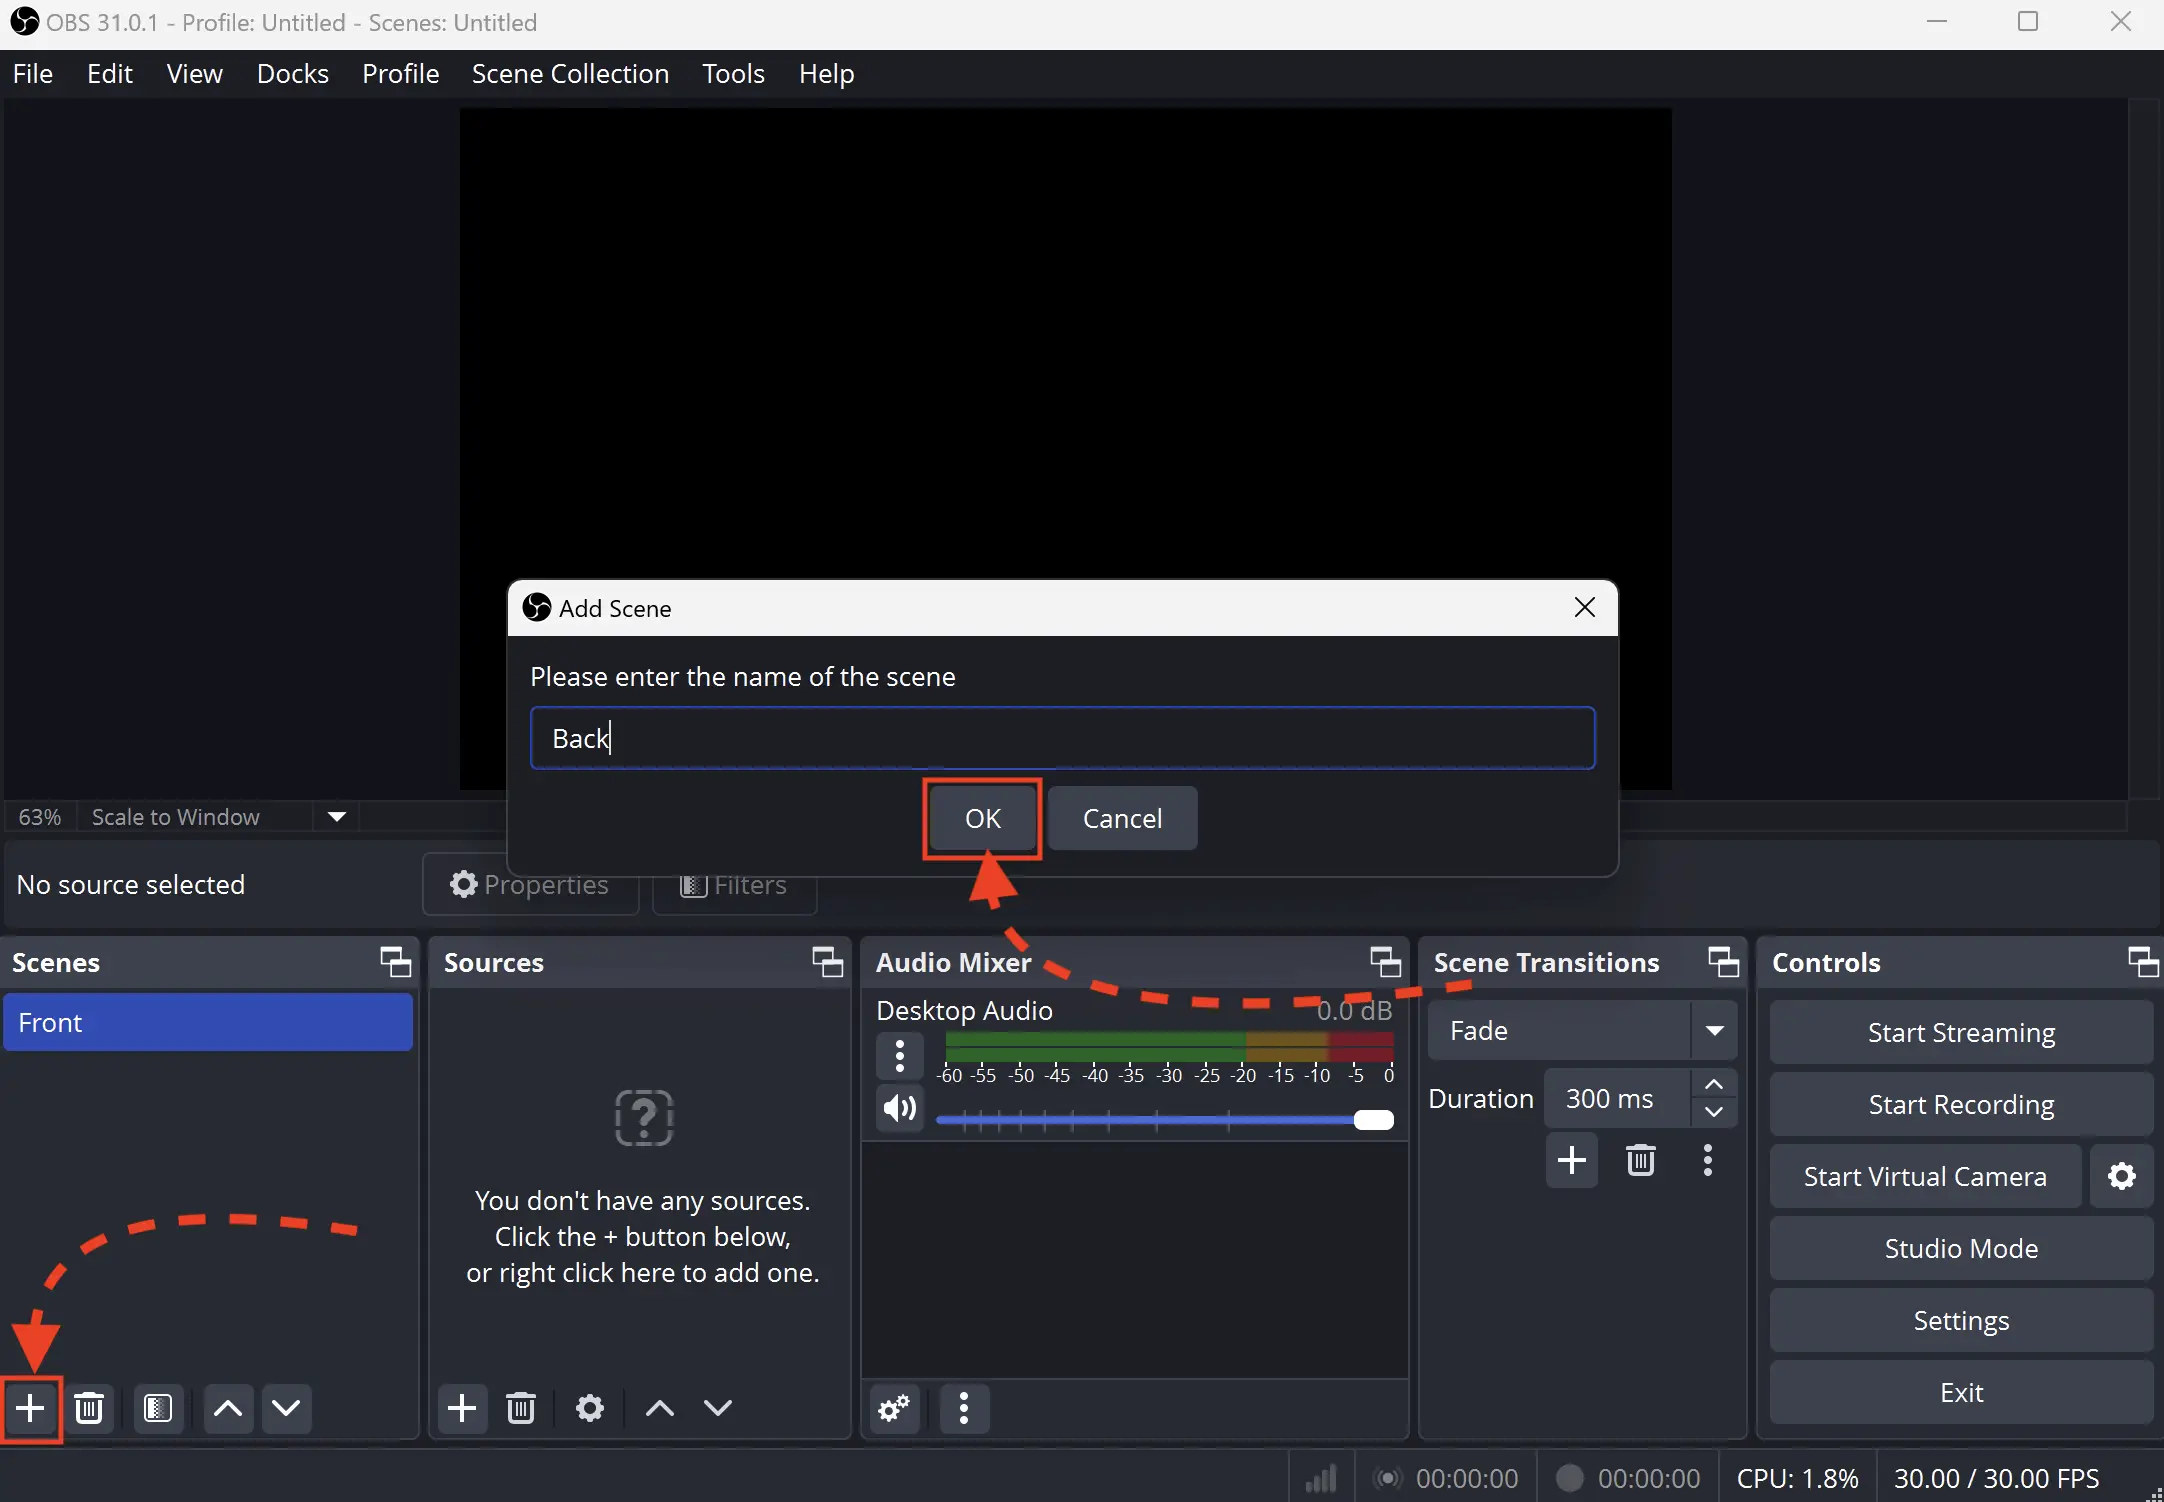
Add another scene. You can rename them for convenience.
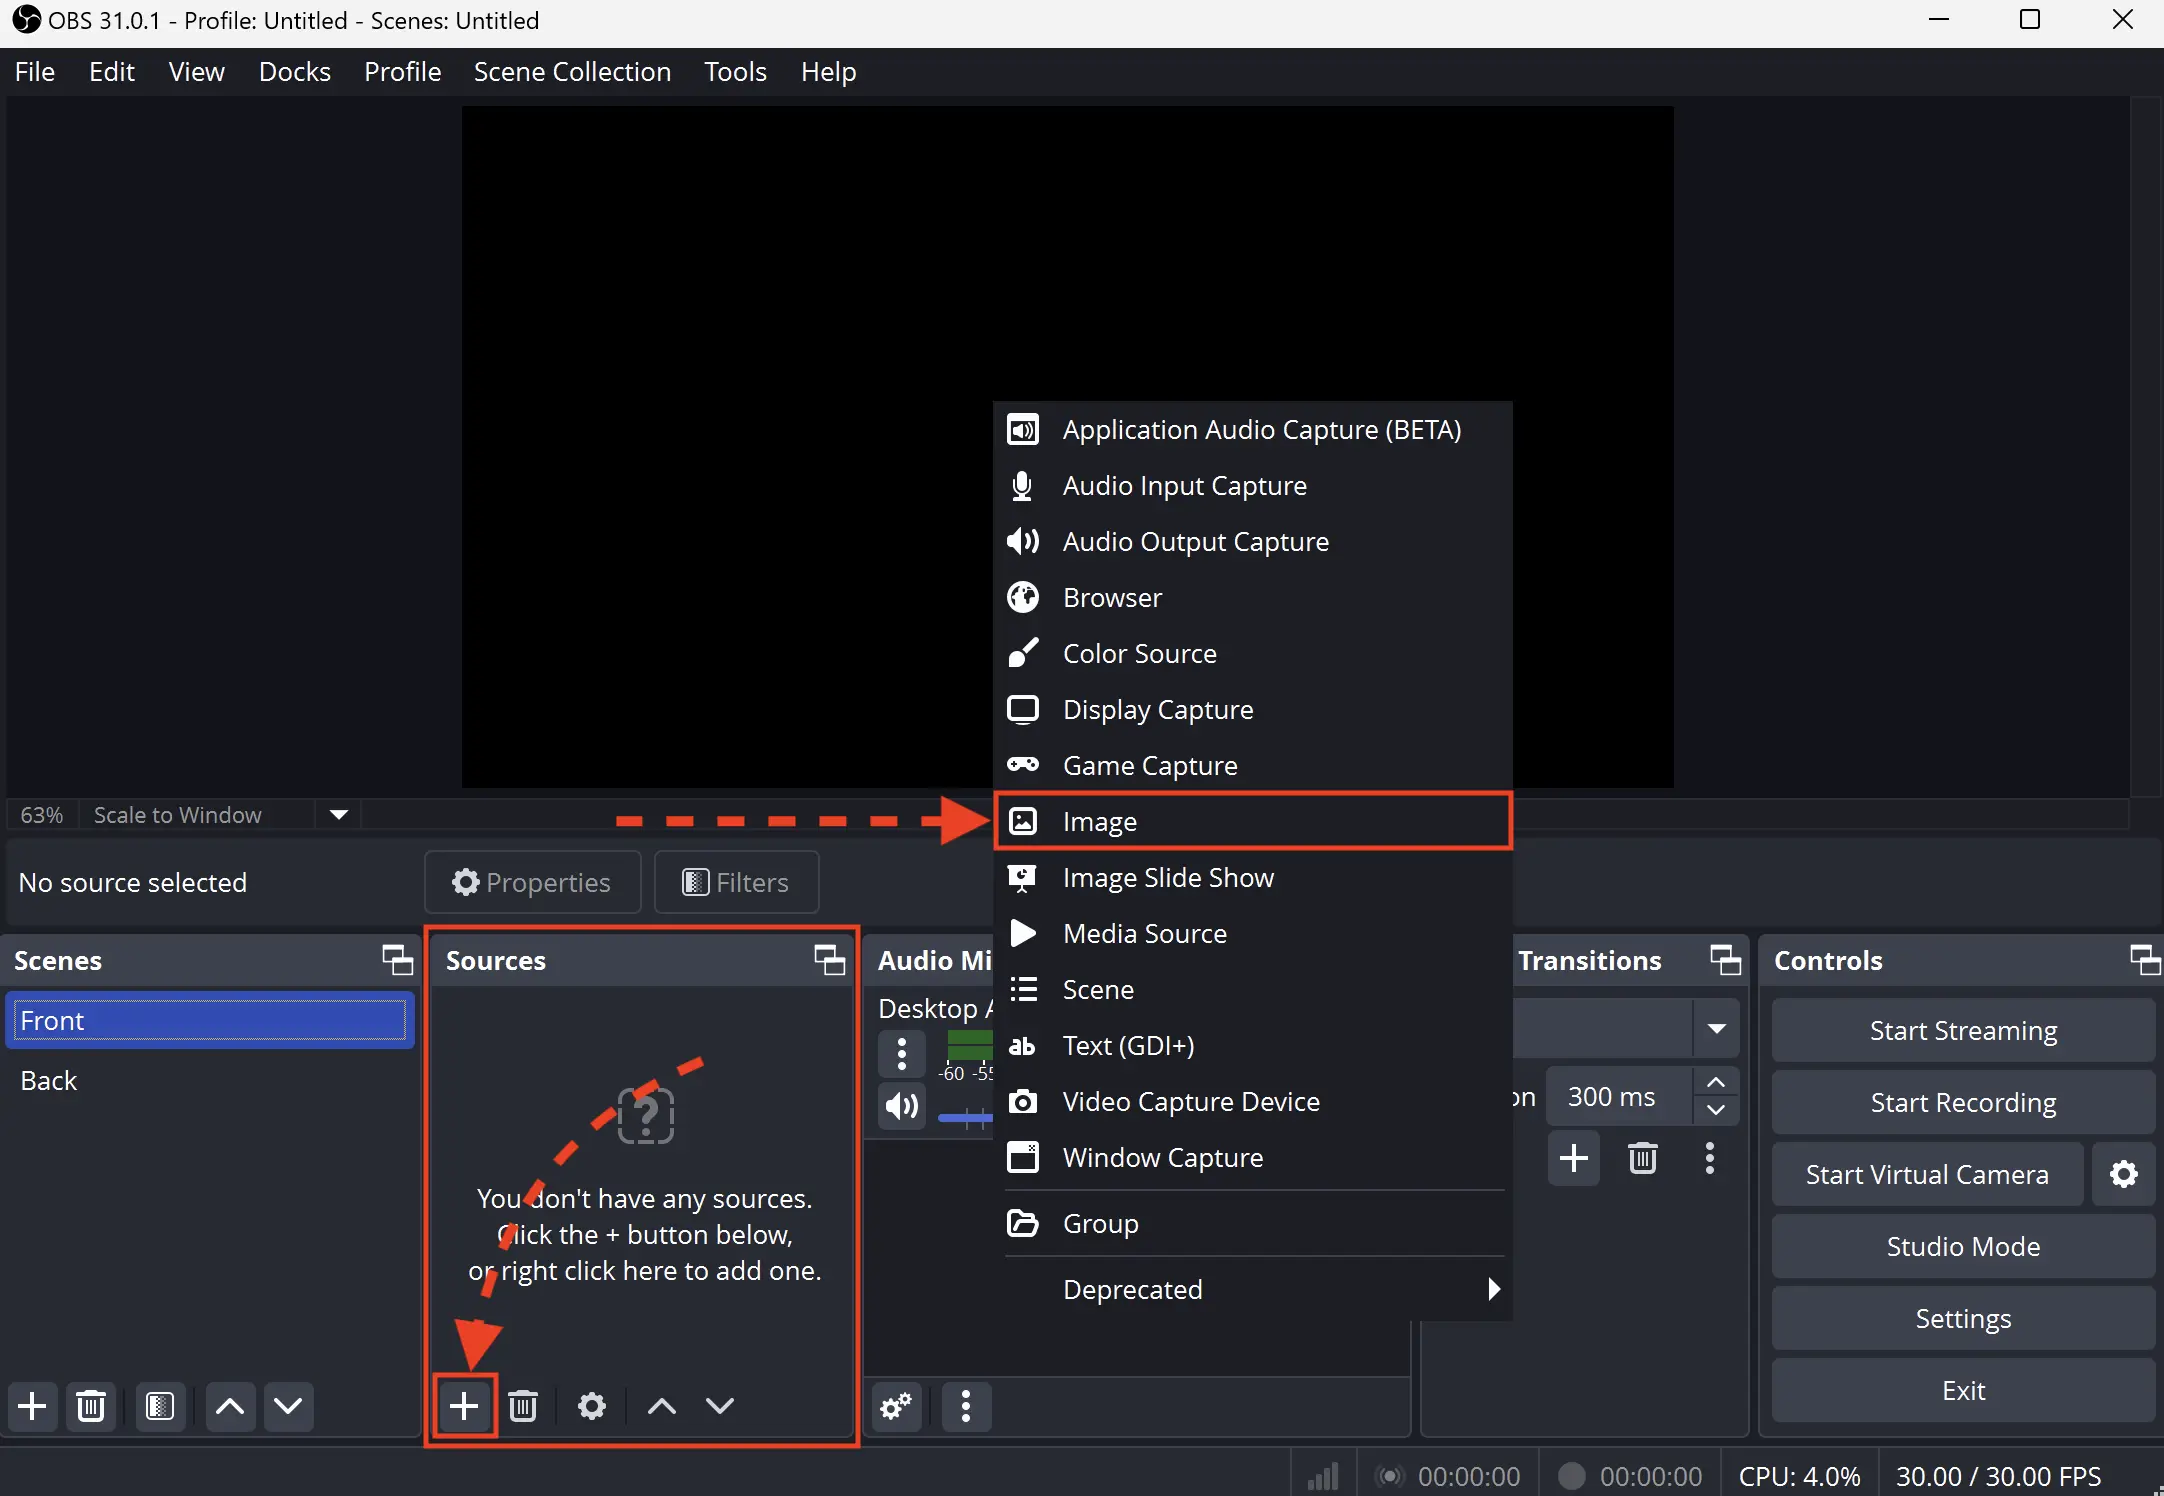
Now let’s add video sources. OBS supports multiple sources, including images, videos, and screen capture. In this case, we’ll use an example with images. Click “+” in the “Sources” section and select “Image” from the dropdown list.

In the window that opens, select “Create new,” assign any name (or leave it as default), and click “OK.” Then click “Browse,” select the desired file, and confirm your selection by clicking “OK.”
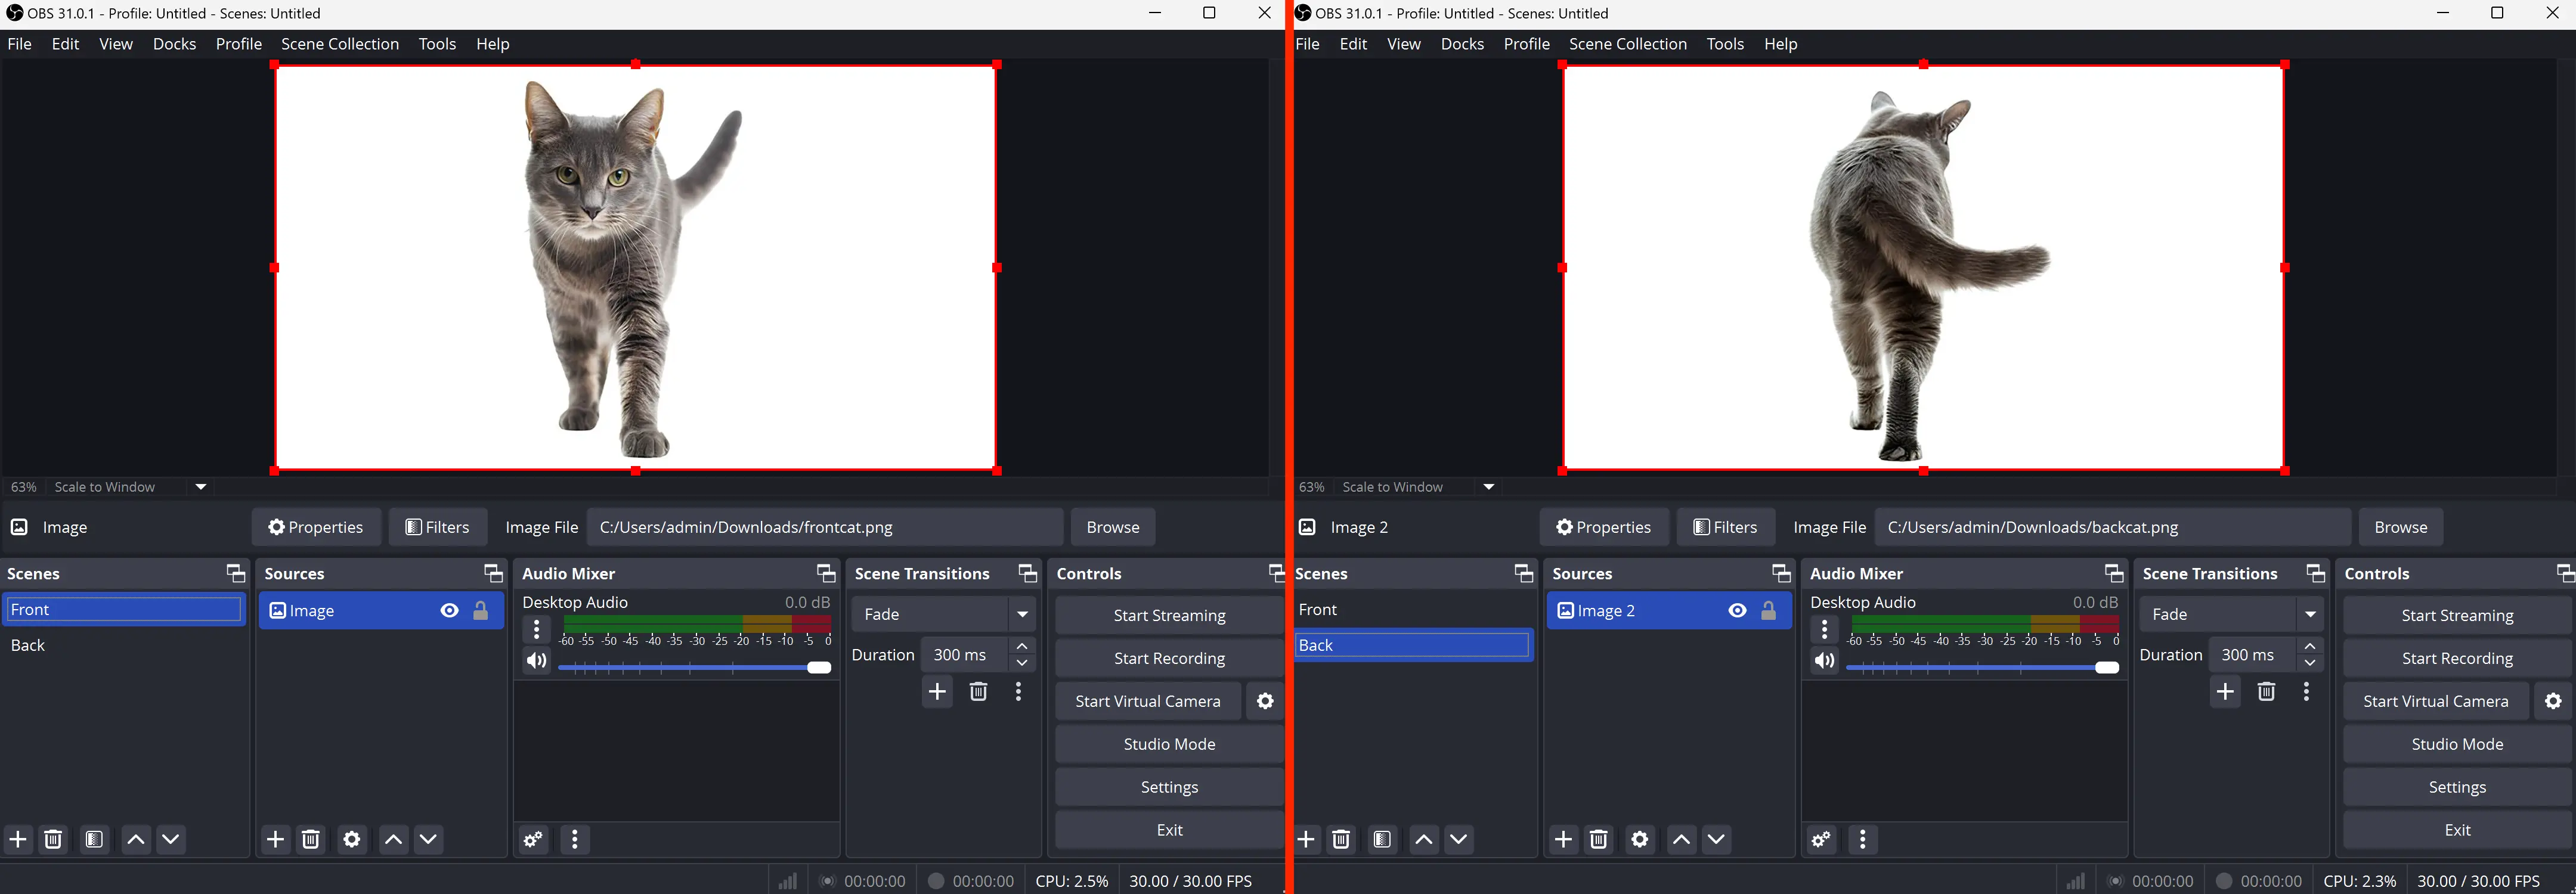
For the second and subsequent scenes, the setup is done in the same way. Starting Virtual Web Cameras
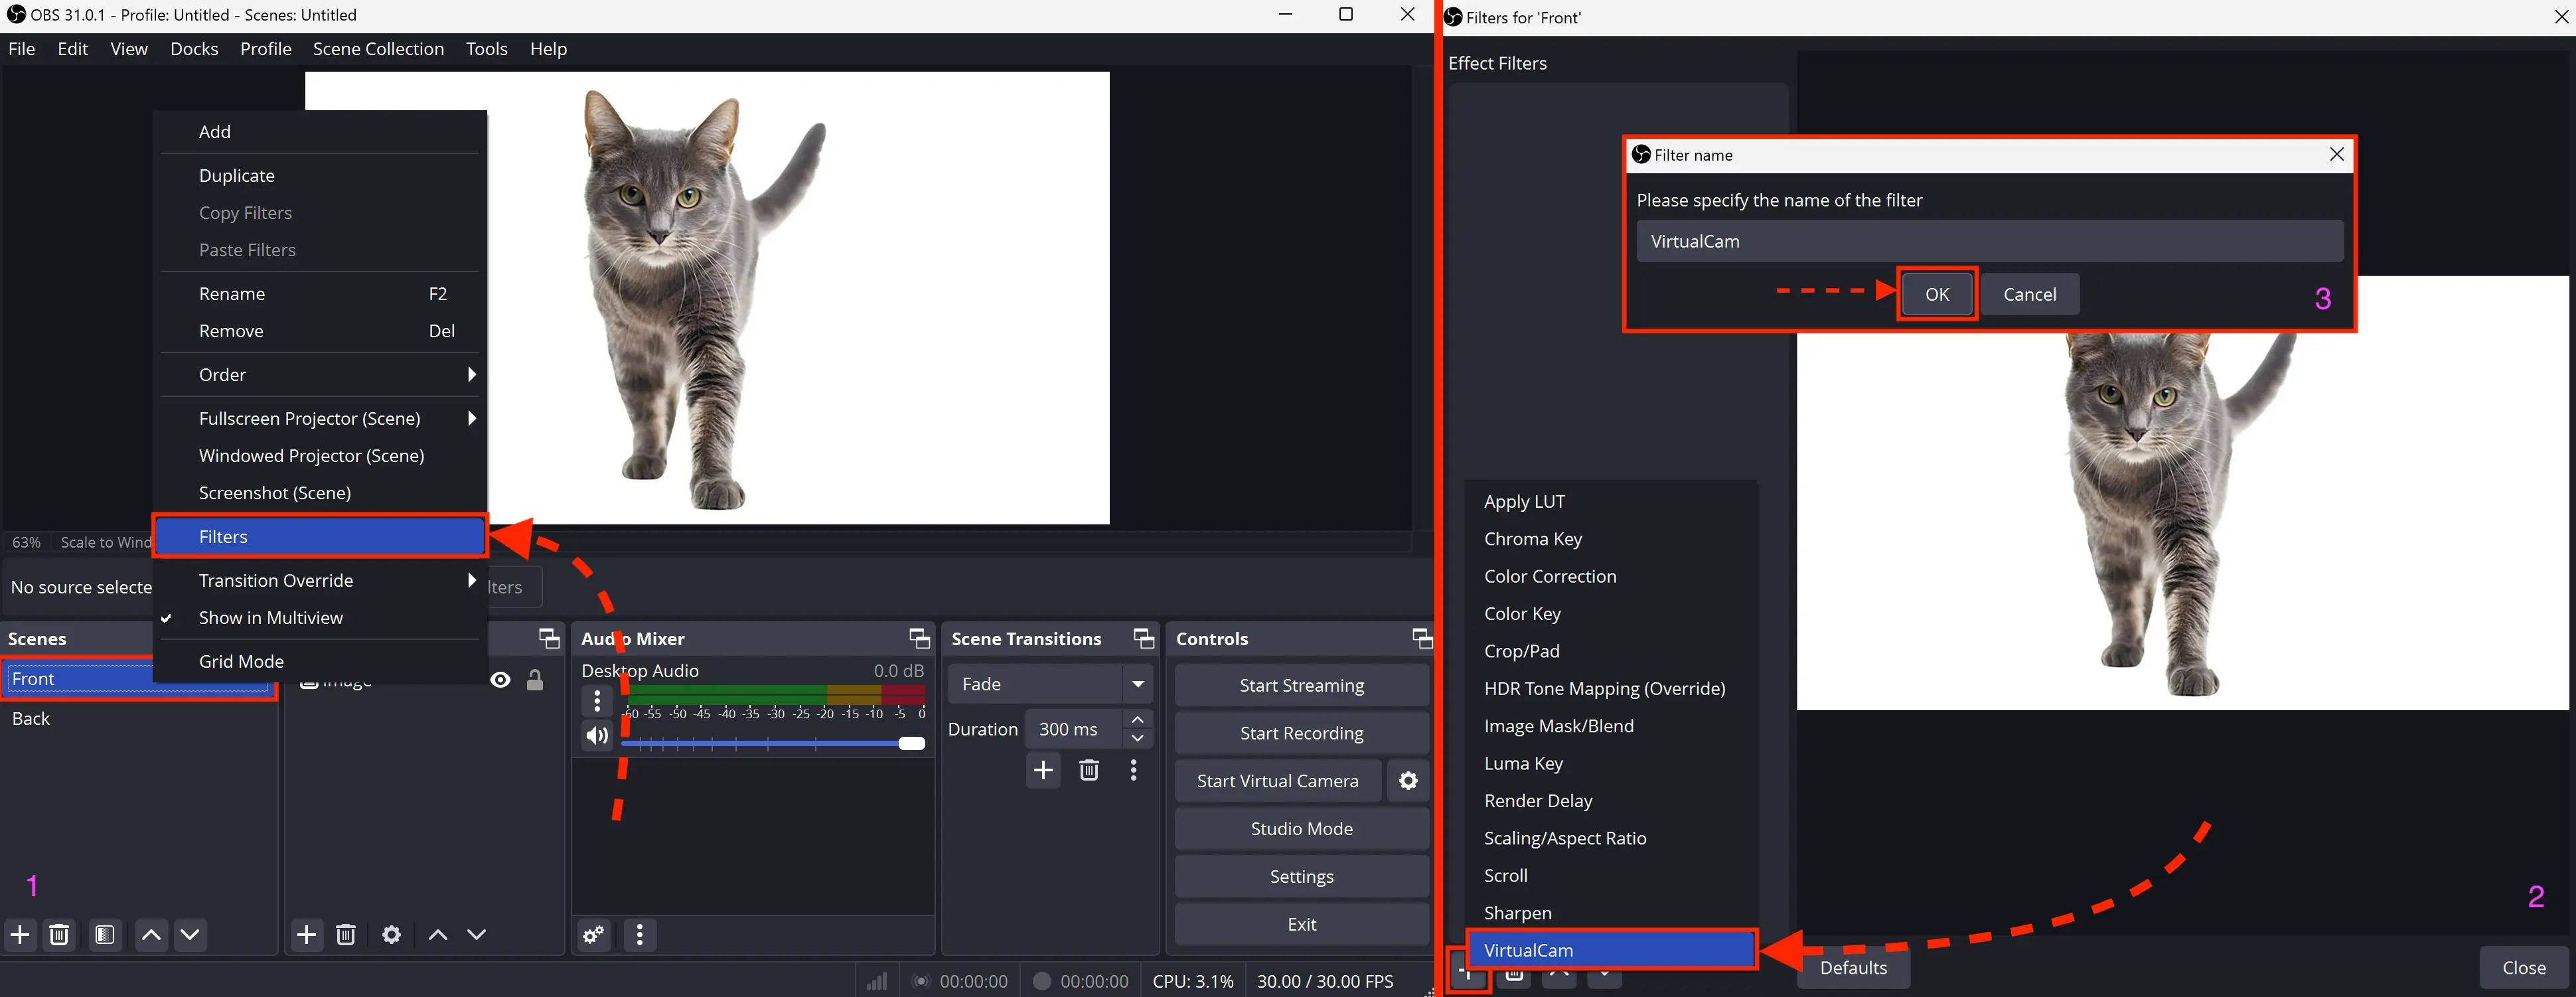
To start a virtual camera:
- Select the desired scene, then right-click on it.
- From the dropdown menu, select “Filters.”
- In the window that opens, click “+” in the bottom left corner → select “VirtualCam” → confirm filter creation by clicking “OK.”
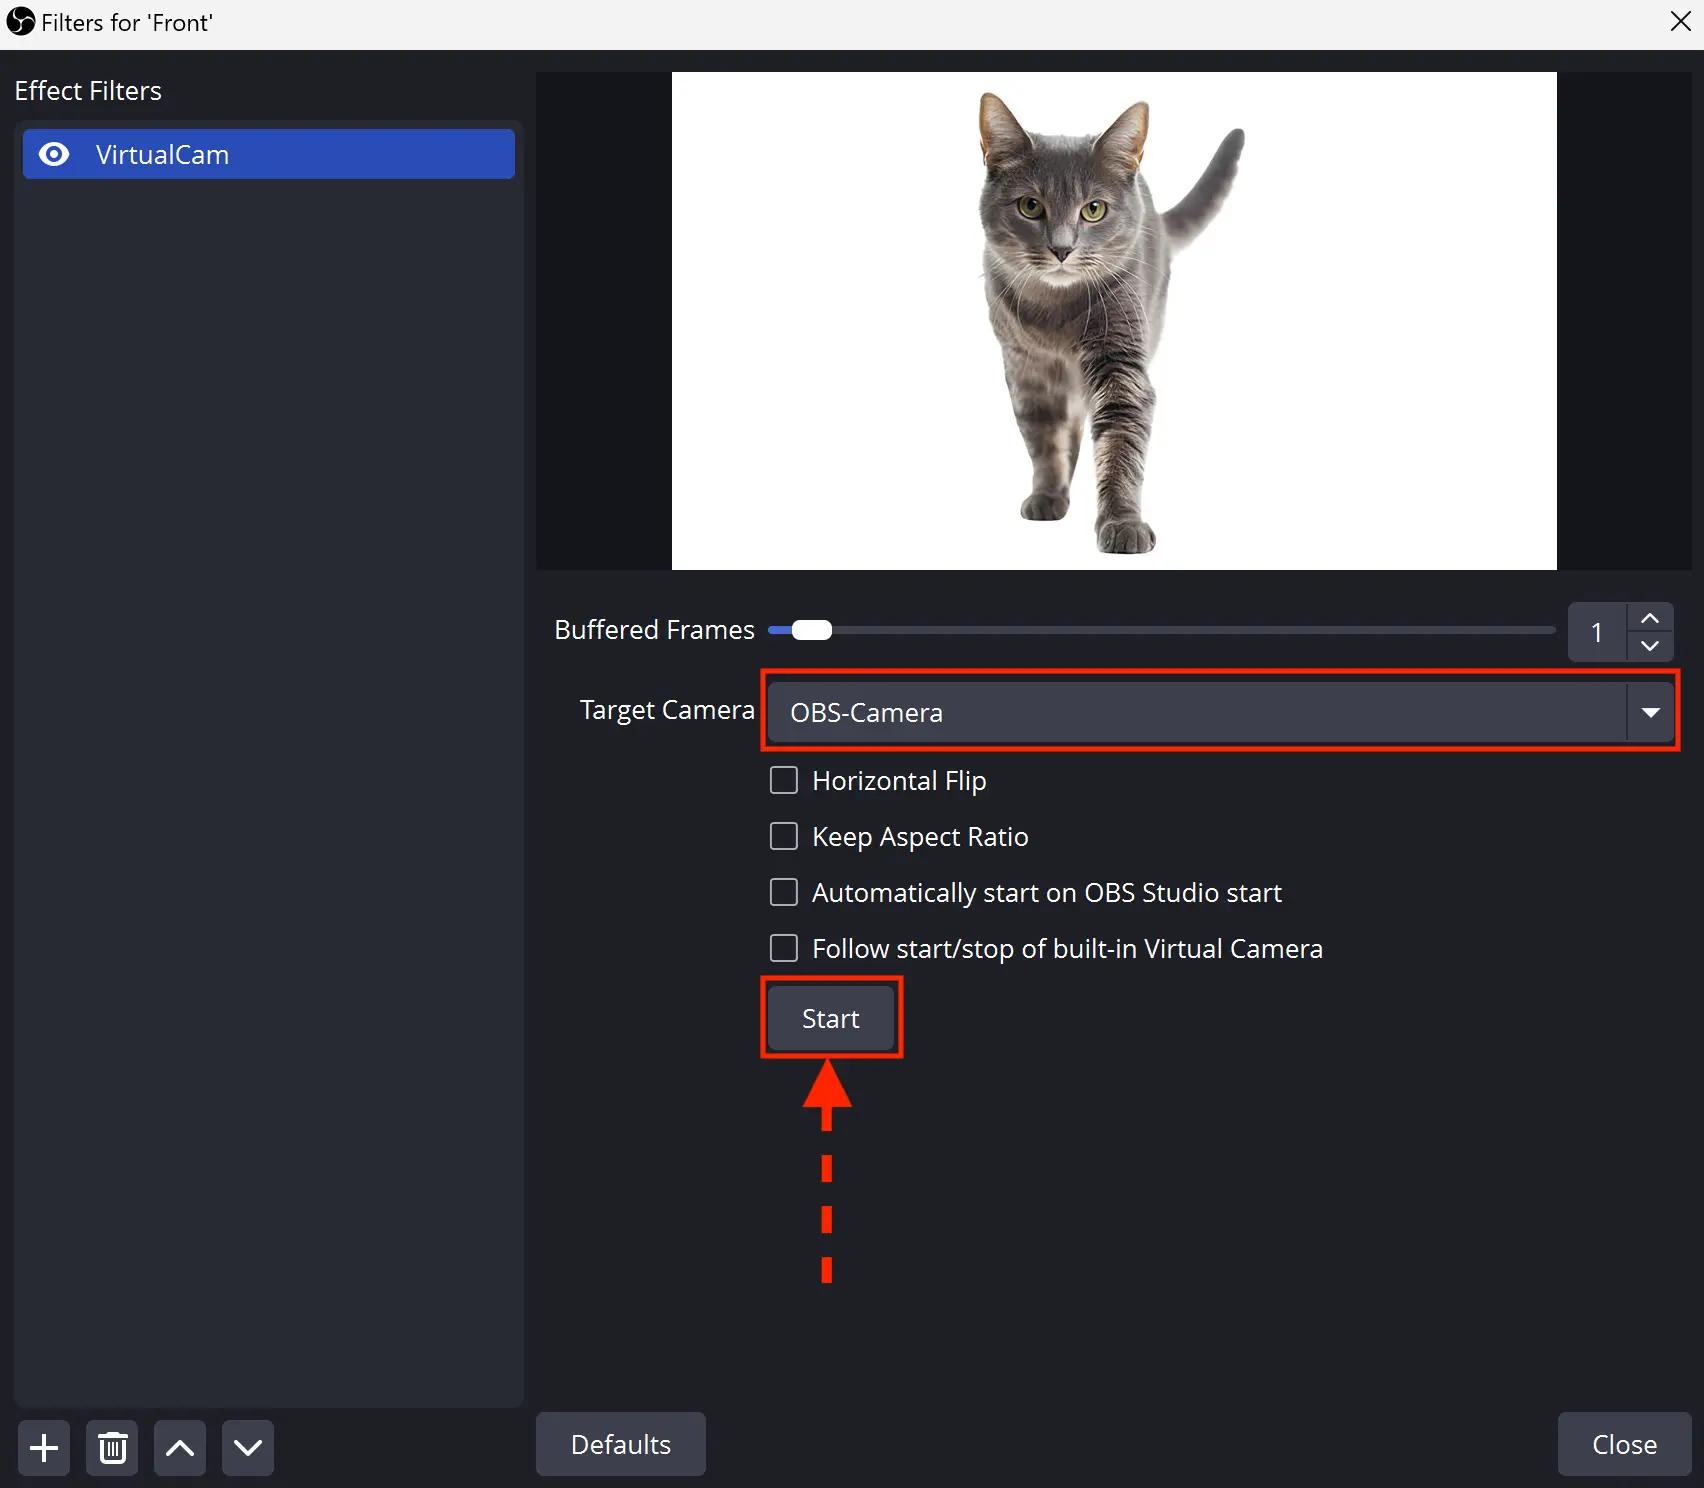
Configure the virtual camera settings in the filter. In the “Target Camera” field, select the virtual camera. For the first scene, leave the default value; for subsequent scenes, choose the next camera in the list. Each scene must be assigned a unique camera. Click “Start” and close the window.
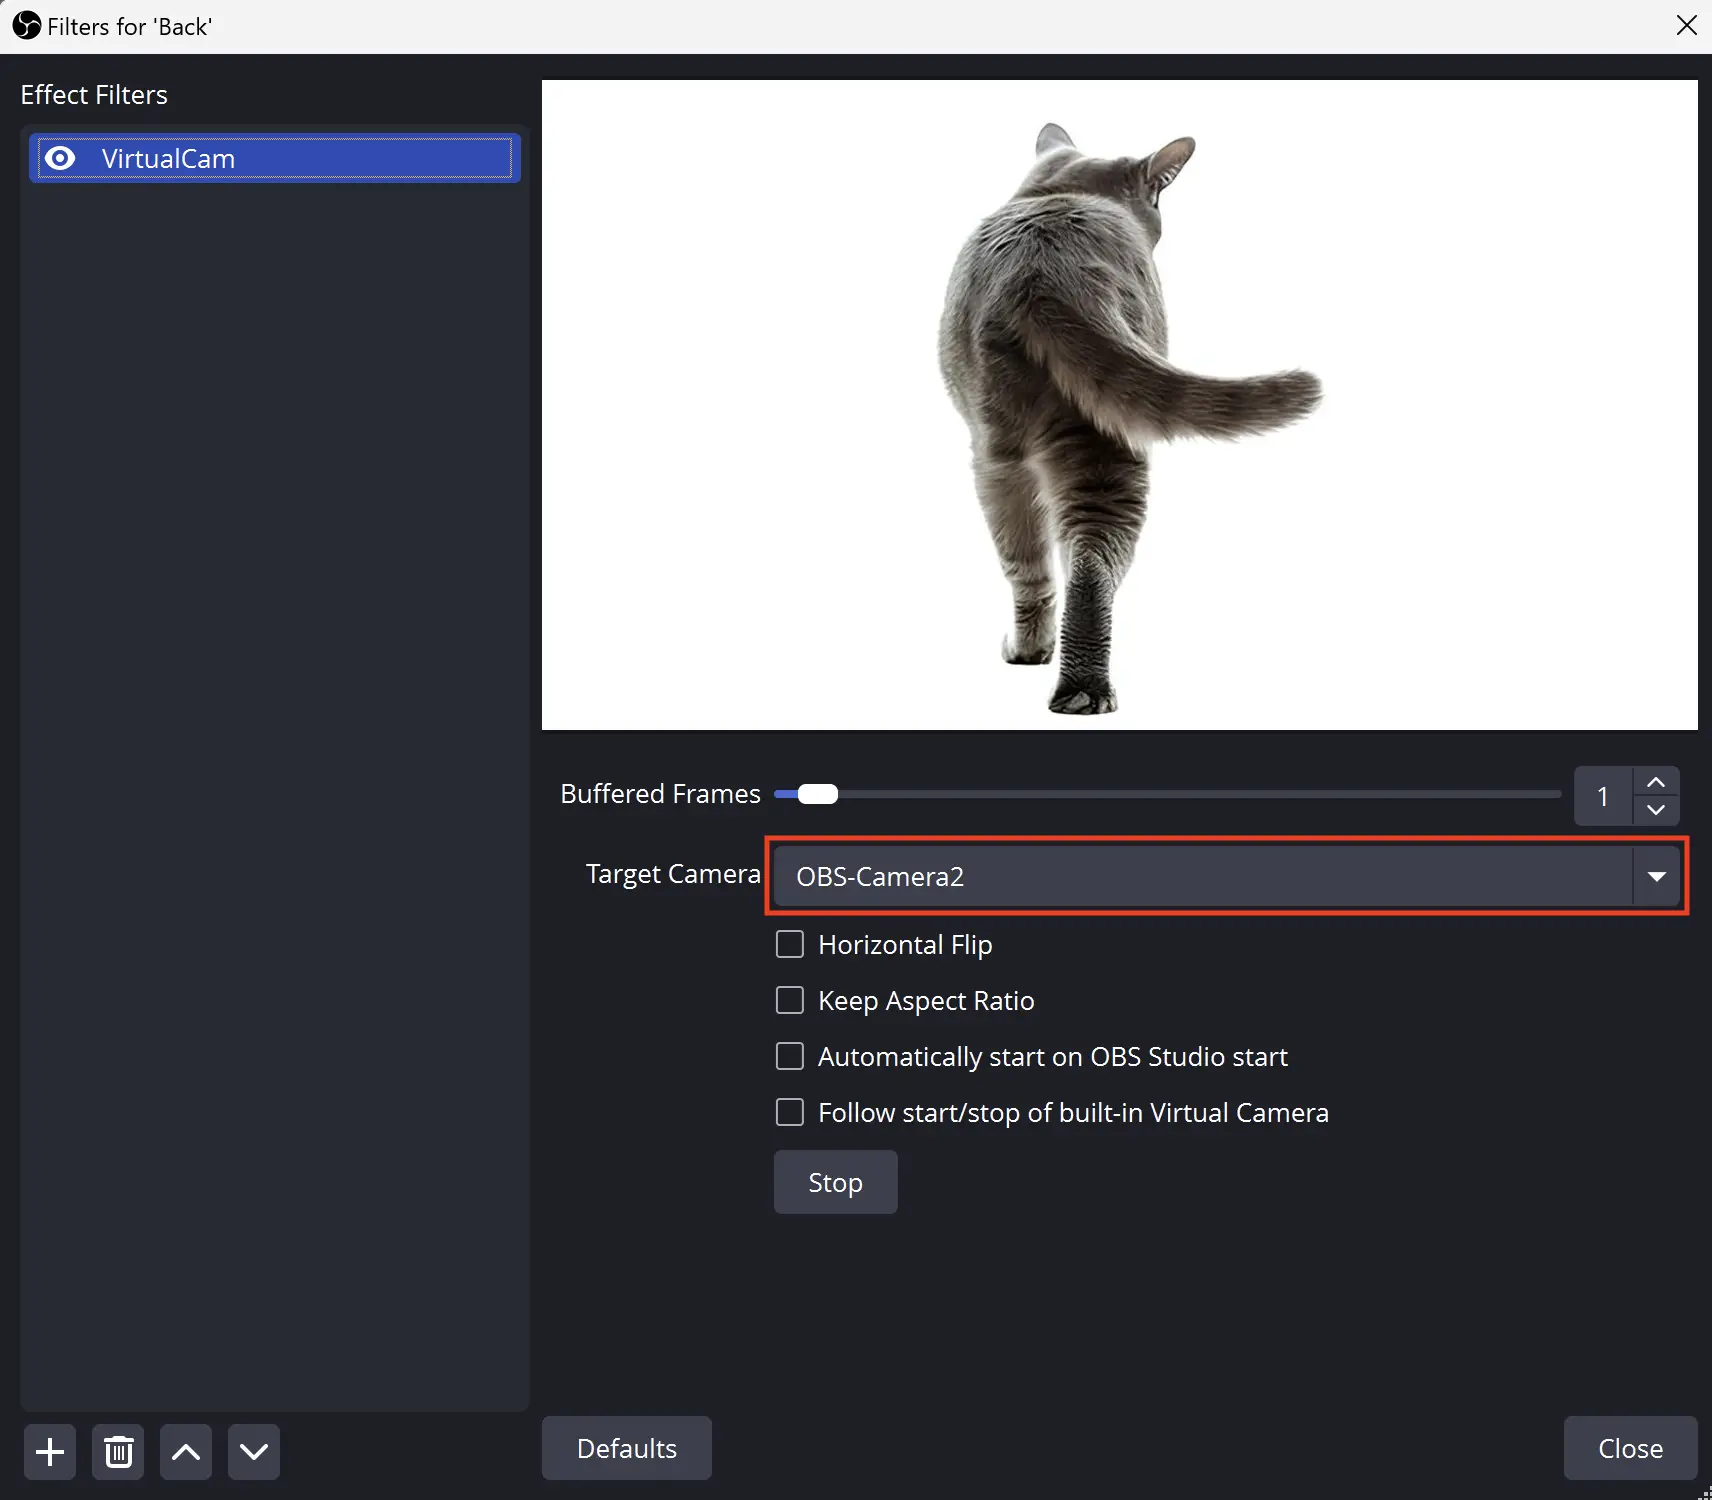
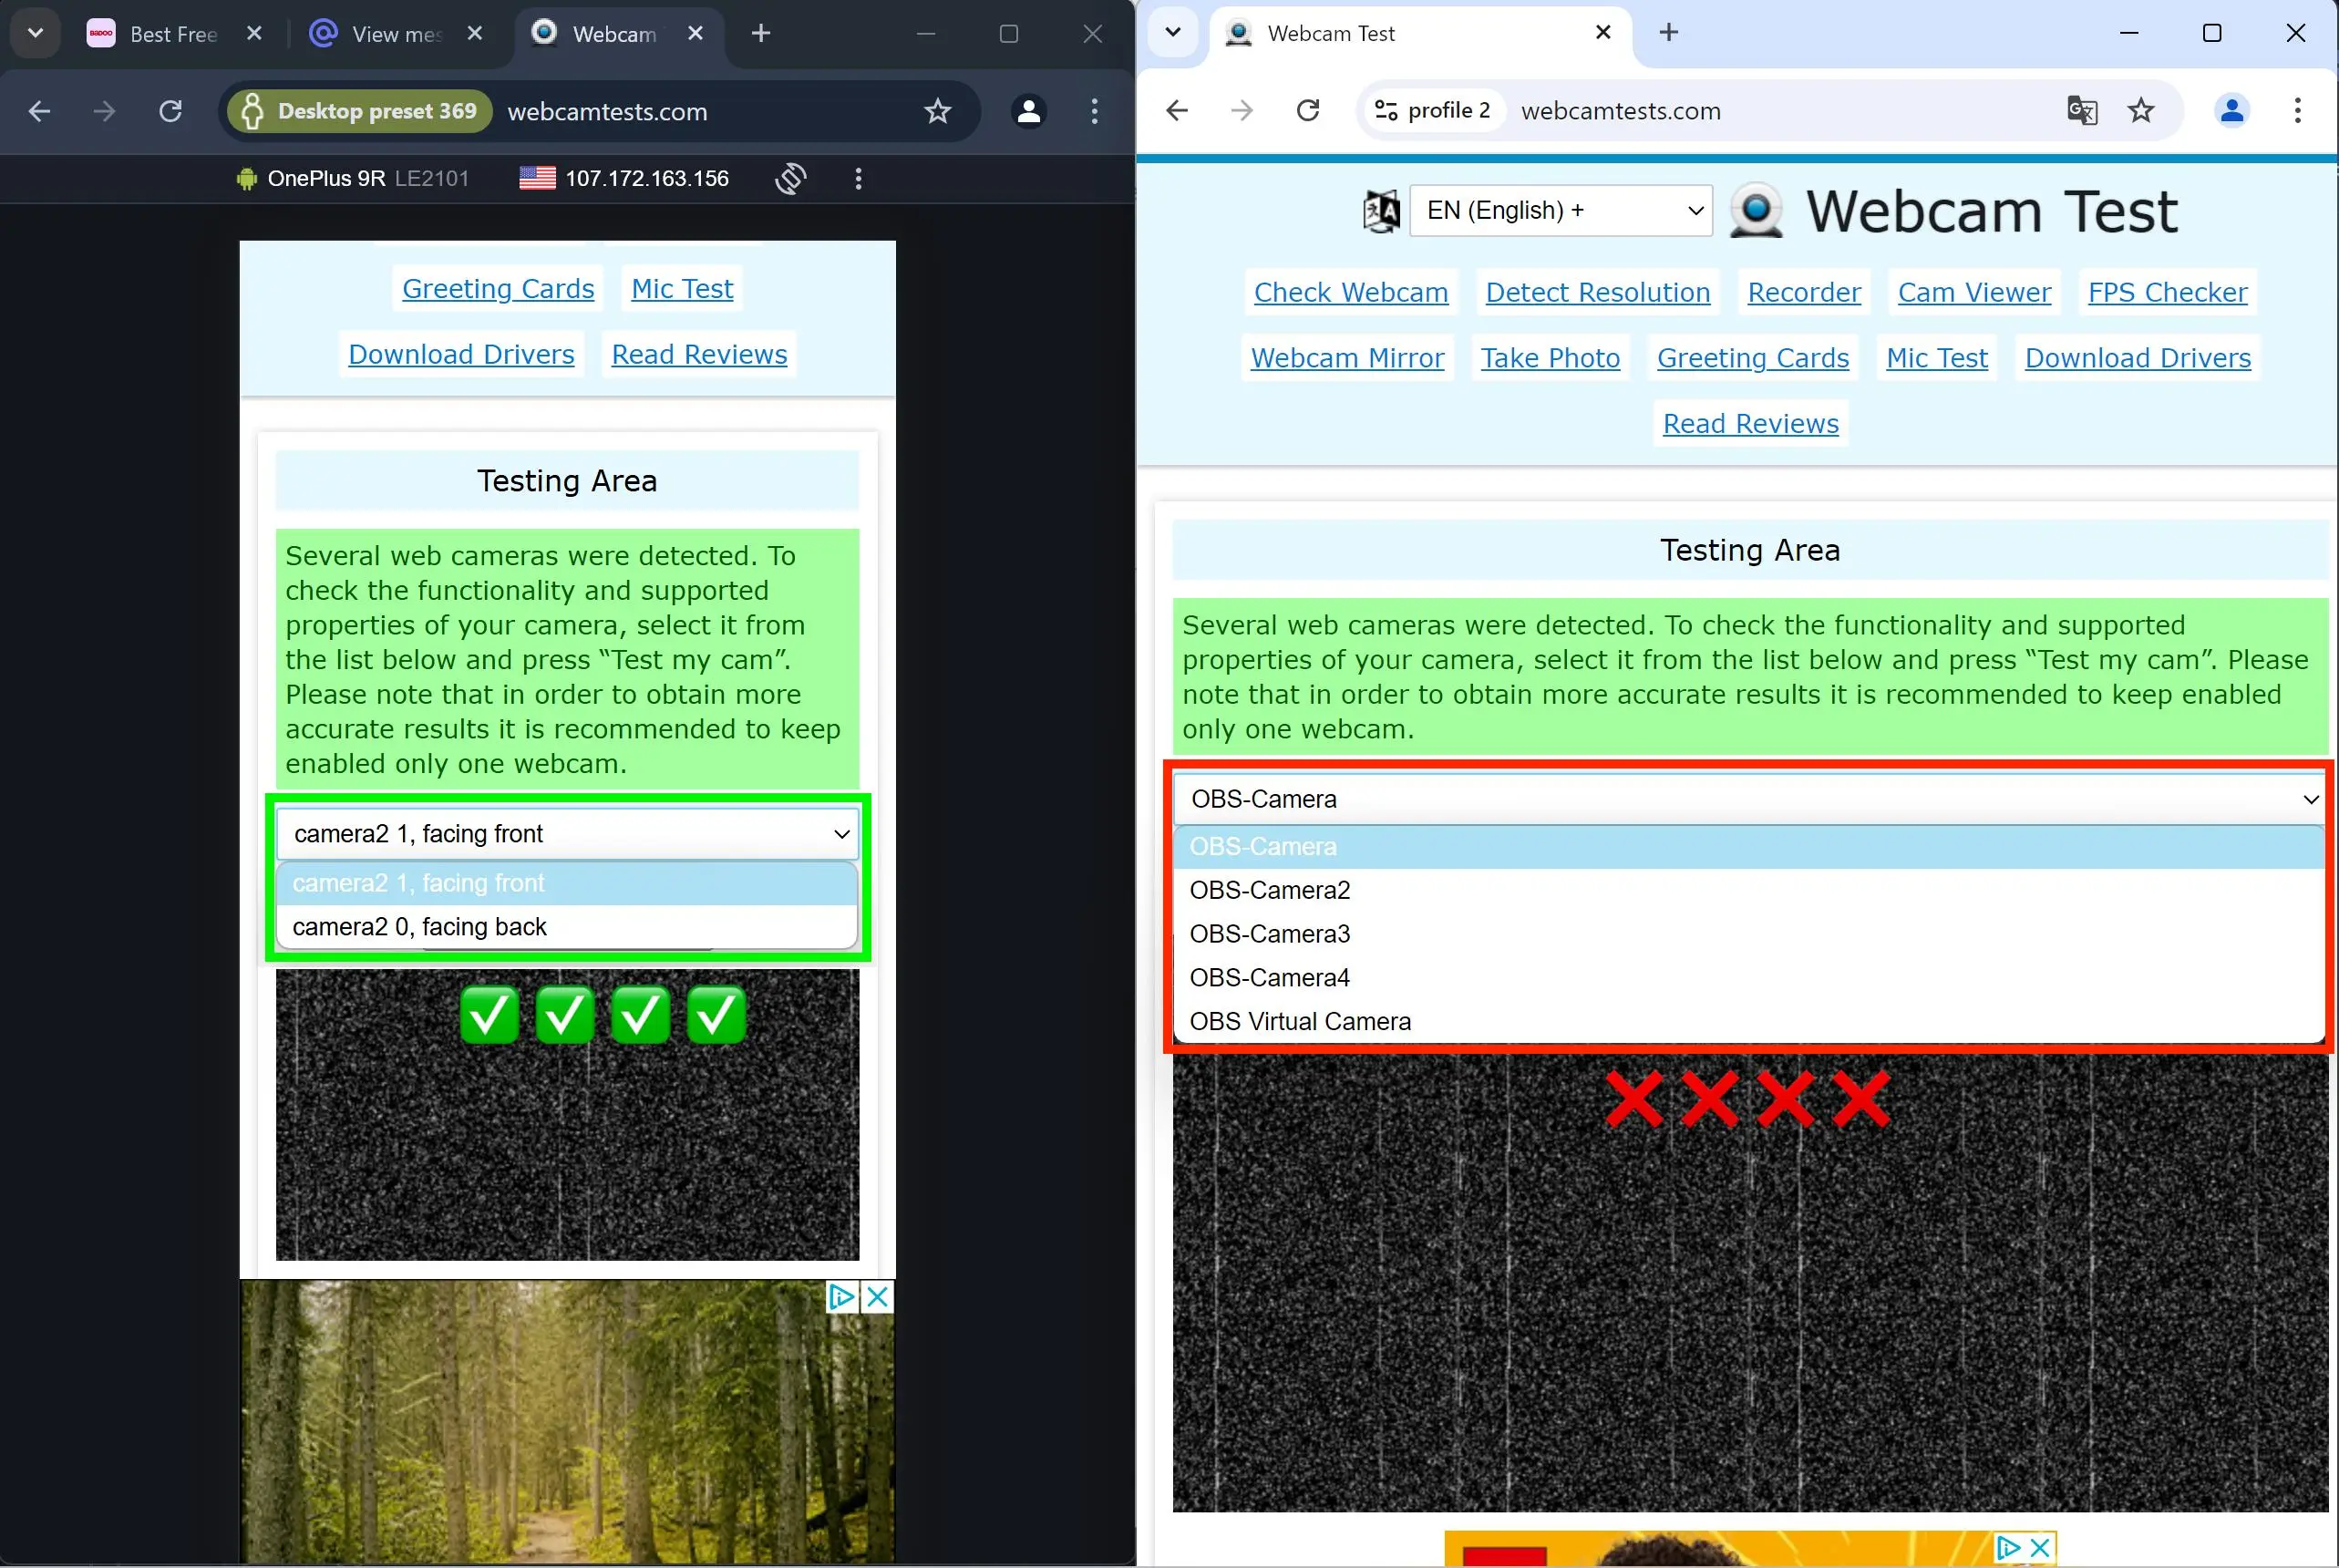
For the second scene, follow the same setup process, selecting the next “Target Camera” in the list. Testing the Setup Launch LS and create a session with a mobile configuration. In this example, the “OnePlus 9R LE2101 (Android 12)” config is used because it has exactly two cameras (front and rear). For other configurations with more cameras, you may need to create additional scenes in OBS, but the principle remains the same. You can check the number of cameras in a specific config on the website webcamtests.com, as shown below.

1. Go to https://webcamtests.com/ 2. Click the button “Click here to allow access to webcam identifiers” 3. Allow access to the webcam in the pop-up request by clicking “Allow” 4. After that, a dropdown menu on the site will display the list of available cameras. In this example, there are 2 cameras, so 2 scenes (virtual cameras in OBS) were created.

Then select the cameras and click the “Test my cam” button. You can open two tabs with the site and launch different cameras in each tab. You will see different images previously configured in OBS running simultaneously. Conclusion
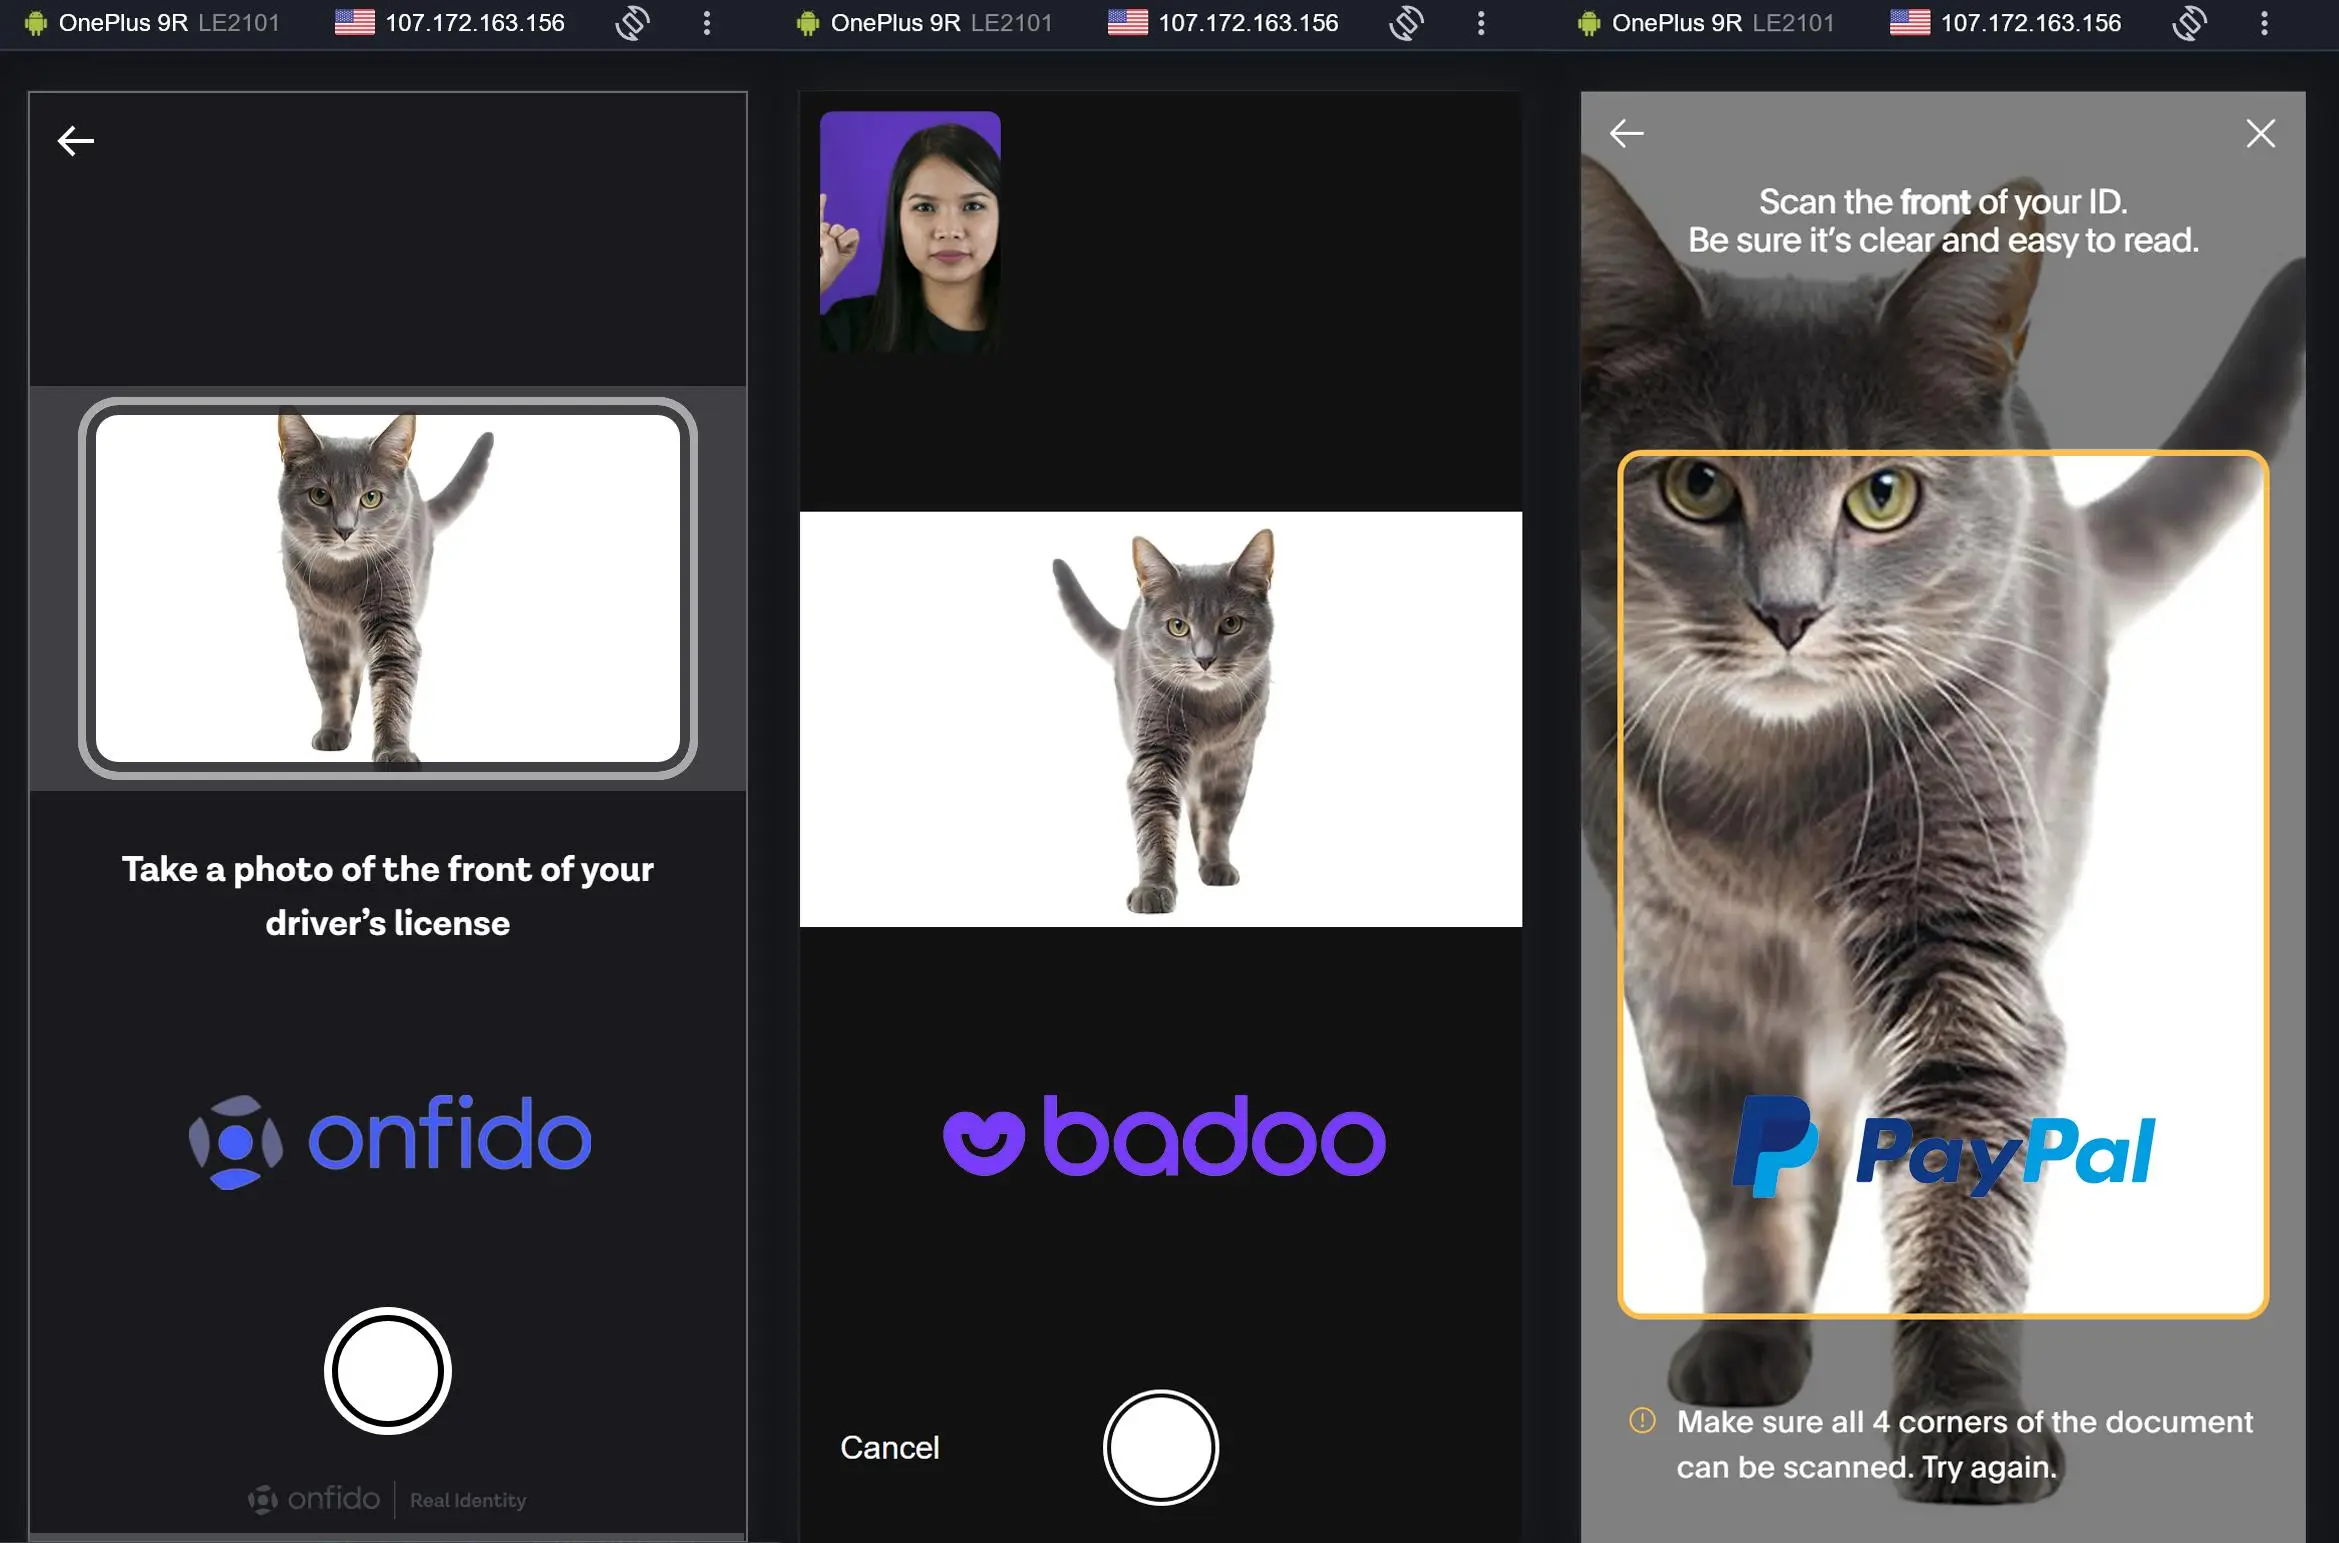
With this setup, you can successfully use mobile configurations to pass KYC verification on various platforms.
Most importantly, for anti-fraud systems, you will appear as a real Android smartphone or tablet. Unlike competitors who do not use media device spoofing.